Showing posts with label web. Show all posts

Tuesday, November 19, 2013

Project Night: A red Raspberry Pi, 126 LEDs and a job

Project night


Every month, through PYPTUG, we set aside 2 nights for the Pythonistas and Pythonistas to be of the Piedmont Triad community. Tomorrow (wednesday the 20th of November) is one such night.

So what do we do there? The meetup page says:

"Do you have a project you want to show off? Or do you need a second set of eyes on your code? Would you like to hack on an open source project? Perhaps you need help getting a module on a specific platform? Don't have a project but would like to help others or to learn more Python?
Whatever the case may be, project nights are your opportunity to get some help or to help others, so bring your laptop (or Raspberry Pi or whatever device that can run Python) and let's get things going."

Red Raspberry Pi


So, I always show up at these project nights with a few potential projects. For example, hacking on Brython, or writing a good music collection manager in Python, or playing with a red Raspberry Pi. Red? Yes, this kind:

http://www.raspberrypi.org/archives/3195 

Pi Lite


But that wouldn't be a project in itself. I'll bring over a Pi Lite. What is that?

Ciseco Pi-Lite
126 ways to have fun.

Spectrum analyzer? network traffic display? game of life? cool scroller? Who knows what i'll end up doing, but it'll be fun, I'm sure.

A job?


Oh yes, almost forgot. So this project night is in Winston Salem:
Inmar 2650 Pilgrim Court, Winston Salem, nc

And it just happen to be that there are some openings for Python developpers, doing web services and focusing on Python. If that sounds like fun, get in touch.

Winston Salem is a great place to live and work (and that's me saying this, coming from cosmopolitan Montreal). Plus Inmar is migrating downtown pretty soon, in the Wake Forest Innovation Quarter. So come on, take the first step and possibly come and join me and other enthusiastic Pythonistas at Inmar and drop me a note, or even better, email me your resume.

Requirements:
Experience with Python (web services a plus) and with Postgresql (or even mysql).

François
@f_dion


Saturday, August 17, 2013

Brython 20130817-141536 published

Download Brython


A new version of Brython, Brython-20130817-141536, has just been published on the downloads page


Changes

Here are the main changes since the previous version :

- improved implementation of import, now supports packages : "import X.Y", "from X.Y import Z [as A]", "from . import X" (fixes issue 123)
- the iterator protocol now uses the standard methods __iter__() and __next__() on all types, including built-in types
- the "for" loop implementation has been changed to use these methods
- improved implementation of comprehensions : now uses global and local dictionaries (fixes issue 129)
- improved interactive console : http://brython.info/tests/interactive_mode.html
- partial support of built-in type "bytes"
- add missing HTML5 tags and DOM events
- change documentation in French, add a section for Brython-specific modules ; updated translation of documentation
- add a button on the Tests page to run all the tests in a row and report errors
- improvement to the markdown module : tags _ and * generate different HTML tags, as well as __ and **
- change implementation of the del keyword : now uses the method __del__() if it is defined

Bugs

  • - bug fixes :
. issue #78 : map() and filter() return iterator objects, not lists
. issue #124 : support of CSS attribute "float"
. issue #125 : add methods copy() and clear() to lists
. issue #126 : escaped quotes inside strings
. issue #127 : DOMNode instances comparison methods (__eq__ and __ne__)
. issue #128 : class inheritance
. bugs in conversion of JS objects in json.js and $JS2Py
. bug with iteration on DOMNode instances


Other


  • package organisation : move JSObject from py_dom.js to py_utils.js
  • gallery : add a demo of a solitaire game using SVG drag and drop


Feedback


As always, the Brython team looks forward to your feedback, particularly in terms of bug reports and also in sharing how you are using Brython, by joining and participating in the Brython forum.

We are quite interested in your experience on mobile devices (tablets etc) and embedded devices (Raspberry Pi, Beaglebone black, Cubieboard etc), particularly in conjunction with touchscreens, as we are about to bring further enhancements to Brython. So don't be shy and join the forum. Or at least contact me through my blog or on twitter.

François
@f_dion

Friday, August 2, 2013

A python interactive console in my blog

Brython modes

I had prepped a presentation on Brython for a Python conference and didn't want that to go to waste, so now, dear reader, you get to see all kinds of exclusive material I had made for it. (Don't worry, I'll have plenty more material for PyCarolinas 2013).

The difference is that this is a blog, not a talk, so it will be a good bit more non linear. I'm starting tonight with something very hands on, one of Brython's mode of deployment.

The Brython interactive mode

The brython.js script itself is not included in this page, so it is a hosted interactive mode. We will simply include an iframe to load an interactive console directly from brython.info. This is still quite experimental, as it is found under the tests/ section. It is now using most of my iframe box (was fixed some days back). But it does work pretty well already.

This is basically a zero install, just add the following in your web page and you'll get a brython interactive session (Edited 3-26-2014 to point to new location):  

<iframe src="http://www.brython.info/console.html" width="98%" height="400">Sorry... your browser doesn't support iframe. Time to upgrade or go to <a href="http://www.brython.info/console.html">http://www.brython.info/console.html</a> in a separate tab.</iframe>


So you should see a console above (wont work trough news aggregators). At the >>> | prompt, type:

x = input("yo")

Type the word me in the prompt dialog that will open. Make sure you type exactly that. So what do we have in x? Type the following:

print(x)

me - Ok, that's all nice, but not very exciting. So it does behave like a console. What else can we do?

import webbrowser

So now we have loaded the module webbrowser from the brython standard library (we will come back to that in a future article). Yeah, I know, mind bending, since we are client side. Let's use the module. Type the following:


webbrowser.open("http://en.wikipedia.com/wiki/internet_" + x*2)

Nice! All your base are belong to us, obviously. So, it does take a minute to get the brain wrapped around this concept, but once you do, the world's your oyster. You just have to:

doc <= "think"
:)

Alright, enough geek puns, but it is a friday night afterall. So go and check it all out at http://brython.info . There is documentation in english, french, spanish and portuguese. Feel free to contribute your own translations in markdown format through bitbucket.

If you've been following my blog, you already know about the <= (left arrow) operator. If not, check it out here: http://raspberry-python.blogspot.com/2012/12/brython-browser-python.html

In the early days, brython didn't have a print() keyword. So I had cooked up a quick webprint() that used the <= operator. Of course, 8 months later, we no longer need webprint(). Print works like it should, with stdout. For the interactive mode, it is redirected. Look at the (python) code to see how you can do that by right clicking on the iframe and doing a view frame source (hint, lines 48 to 51).


François
@f_dion


Wednesday, July 31, 2013

Site brython.info em portugues

Site

Algo novo hoje:

em portugues!

Documentação


O site juntamente com a documentação foi traduzido. Tudo graças aos esforços de Yuri Teixeira.

Grupo

Existe tambem um grupo googlegroups em portugues:

https://groups.google.com/forum/?fromgroups=#!forum/brython-pt

François
@f_dion
 

Tuesday, February 5, 2013

100000th visit

Raspberrypi and Python


Seems like yesterday when I thought this would make a great combo, but it was in fact February 2012. I eventually got my first Raspberry Pi in June of last year, and then after a few months, I thought, I'm having a ton of fun with this, I should probably post this online.

I started this blog less than 6 months  ago, and considering how this blog is fairly technical, I didn't expect a lot of visitors. Plus, by having multiple languages mixed in, there was a definite possibility that it would make it even more out of reach of many. Still, the motivation was to help people learn more about Python, about the Raspberry Pi.

The visitor 

Yesterday, I saw the stats for my blog, and thought, wow, is that possible, I'm about to reach a nice milestone. I have to catch where that 100,000th visit will come from. Brought up the Analytics while tracking the visits, and it looks like that 100,000th visit came from King of Prussia, PA. That was an interesting coincidence, as this was the last city I knew that the friend I mentioned in the article going in the wrong direction lived in. We live in such a connected society, yet we can still somehow manage to lose connections.


King of Prussia, PA

Going back to our story, of course, Analytics only provide you the city of the internet provider, so I don't really know where this visit really came from...


François
@f_dion

Gráficos en la consola

Pygame, RaspberryPi, Webcams.


Pygame utiliza SDL para los gráficos, así que soporta directamente la consola o X windows. Es el caso en todas la plataformas (Unix, Linux, Mac, no solo en Raspbian sobre el RaspberryPi).

Si no conocen nada de Pygame, hay tutoriales en espanol aqui:
razonartificial.com

En mi caso, necesitaba código para capturar imágenes de una webcam (por un taller PyHack). con Python y Pygame, es muy sencillo. Hacer el import y init de los modulos, crear un objeto cam (de resolución 320x240), iniciar la camara, obtener una imagen (cam.get_image), y grabar como png.


import pygame
import pygame.camera  # experimental
from pygame.locals import *

pygame.init()
pygame.camera.init()

cam = pygame.camera.Camera("/dev/video0", (320,240))  # webcam

cam.start()
image = cam.get_image()
pygame.image.save(image,'fablocker.png')
cam.stop()

El mismo código funciona en la consola o el escritorio, perfecto con los cron jobs.


Matplotlib


Hay otros módulos Python que dependen de un servidor X windows. En casos de que no se require OpenGL (no hay en Raspberry Pi) o OpenGL ES, hay un servidor basico que podemos utilizar: xvfb.

Primeramente hay que hacer la instalación de xvfb:


$ sudo apt-get install xvfb


Matplotlib es bueno para hacer imagenes y incluirles en informes de actividad de servidor, por ejemplo. Un servidor web no requiere X windows, asi que porque deberiamos utilizar LXDE o otro escritorio grafico, solo por hacer imagenes que vamos a incluir en una pagina web?

Con xvfb, no hay problemas. Un script que contiene el código Python siguiente (poner en un fichero mpl.py):


from matplotlib.pyplot import *

plot([2,4,2,5,6,3,1])
savefig("graph.png")

Es lo que haria normalmente. Pero si tratamos de ejecutar el script directamente, vamos a recibir un error. A utilizar xvfb, eliminamos el error, así:

$ xvfb-run python mpl.py
  Va a generar un fichero graph.png que se vera asi:


Todo de la consola, sin escritorio gráfico.


François
@f_dion

Friday, February 1, 2013

RaspberryPi talk @ForsythTechCC

Presentation

I'll be giving the talk "Raspberry Pi: From Kindergartners To Mad Scientists" at ForsythTech in Winston Salem, NC this coming Monday at 5:30pm (Feb 4th), and Thursday at 3pm (Feb 14th). It will be in the Hauser building, room 332.

Old school flyer

Just got a copy of the flyer:

It's that $25 computer talk

Each time I give this talk somewhere, it ends up quite different from the previous one. In part due to questions, and in part because I adjust the content to the target audience.

Should be fun, there is interest from several programs, so I'll cover a wide range of material.


@f_dion

Tuesday, January 29, 2013

Applications pour téléphones mobiles avec Python

C'est une traduction de iPhone app with Python. J'ai eu une forte demande pour la version française.

Grâce a Brython


L’icône Brython GPS


Une vraie app pour iPhone?


Le programme lancé, on y voit un écran de démarrage, comme il se doit:

Splash (ancienne carte de Caroline du Nord)

Mais c'est un programme web, et pas une application faite avec xcode.

Le premier écran, mode manuel


Mode mise a jour automatique

J'essaie?


Il suffit d'aller sur le lien de la galerie de Brython, ici:

gallery/geo.html et sur un iPhone, on l'ajoute a l'ecran d'accueil. On peut maintenant lancer le programme comme une vraie application iOS.


J'ai déjà vu cela, non?


C'est bel et bien une application web, donc basée sur HTML et CSS, mais le code lui même, c'est écrit en Python. En plus, on utilise ici une toute nouvelle fonctionnalité de Brython, en faisant appel a un script Python externe a la page HTML (c'est une nouveauté qui date de cette fin de semaine), plutôt que d'avoir le code a même la page HTML. Cela nous permet une séparation de la présentation, de la logique et du "bling" (le CSS):

Notre HTML


<!DOCTYPE html>
<html>
    <head>
        <title>Brython test</title>
        <meta charset="iso-8859-1">
        <meta name="viewport" content="user-scalable=no, width=device-width, initial-scale=1,maximum-scale=1">
        <meta name="apple-mobile-web-app-capable" content="yes">
        <script src="../brython.js"></script>
        <script type="text/python" src="navi.py"></script>
        <link rel="stylesheet" type="text/css" href="navi.css" />
        <link rel="apple-touch-icon" href="icon.png"/>
        <link rel="apple-touch-startup-image" href="splash.png">
    </head>
    <body onLoad="brython()">
        <div id="header">
            <H1>Votre position</H1>
            <div id="switch">
                  <span class="thumb"></span>
                    <input id="refr" type="checkbox" />
                </div>
            </div>
        </div>
        <div id="navarea"></div>
        <div id="maparea"></div>
    </body>
</html>

Application web pour iPhone typique, mais sans jQuery mobile ou autre module du genre. Et pas de onclick dans la page html. L'unique javascript c'est brython.js qui est l’interpréteur Brython même et l'appel a brython() par l'entremise de onload.

Le code Python n'est pas sur la page, mais on voit qu'on y fait reference par src="navi.py"

Allons donc voir ce qu'il y a dans ce fichier navi.py:

Notre Python


# globals #########################
refr = False
geo = win.navigator.geolocation
watchid = 0


# les fonctions ###########################
def navi(pos):
    xyz = pos.coords

    ul = UL(id="nav")
    ul <= LI('lat: %s' % xyz.latitude)
    ul <= LI('lon: %s' % xyz.longitude)

    mapurl = "http://maps.googleapis.com/maps/api/staticmap?markers=%f,%f&zoom=15&size=320x298&sensor=true" % (xyz.latitude, xyz.longitude)
    img = IMG(src = mapurl, id = "map")
    try:
        doc["nav"].html = ul.html  # on met a jour la liste
    except KeyError:
        doc["navarea"] <= ul  # on cree la liste
    try:
        doc["map"].src = mapurl  # on met a jour l'url de l'image
    except KeyError:
        doc["maparea"] <= img  # on cree la balise img

def nonavi(error):
    log(error)

def navirefresh(ev):
    global refr, watchid
    refr = False if refr else True
    if refr == True:
        doc["switch"].className = "switch on"
        watchid = geo.watchPosition(navi, nonavi)
    else:
        doc["switch"].className = "switch"
        geo.clearWatch(watchid)

# au demarrage ###########
if geo:
    geo.getCurrentPosition(navi, nonavi)
    doc["switch"].className = "switch"
    doc["switch"].onclick = navirefresh  # on associe un evenement onclick
else:
    alert('geolocation not supported')

On établis 2 fonctions de rappel (callback). Une si on a notre géolocalisation (navi), et une s'il y a une erreur (nonavi), et finalement, une autre fonction (navirefresh) pour s'occuper de l’événement onclick du contrôle auto refresh dans la barre de menu de l'application. Le démarrage initial se fait par un appel a geo.getCurrentPosition avec nos fonctions de rappel. Ça fonctionne assez bien comme GPS.

Notre CSS

Le CSS étant un peu long, je ne le mettrai pas sur mon blog, mais vous pouvez trouver le code sur le site brython.info ou sur googlecode: SVN repository. Le CSS pour l'interrupteur genre ios 5 a ete emprunté ici: ios-5-style-switch-control

Ce n'est que le début

Alors voila, c'est un point de depart pour faire toute sortes de choses. Un tracker pour le jogging, le velo (avec local storage et synchro par appel ajax) et bien d'autres choses. Vous pouvez désormais faire tout cela avec votre langage favori (Python, bien sur) que ce soit pour votre téléphone mobile ou tablette. Cet exemple est quelque peu spécifique au iPhone (surtout a cause du CSS), mais fonctionne sur Android aussi et peut être adapté facilement aux tablettes. Et cela ne m'a pas pris beaucoup de temps.

Et si vous avez besoin d'aide, n'oubliez pas qu'il existe une liste en francais:
forum/brython-fr

@f_dion

Monday, January 28, 2013

iPhone app with Python

Thanks to Brython


Brython GPS icon


Native? Not quite...


The application launches with a splashscreen, like it should

Splash page

But it is really a web application.

Tracking my progress
Automatically refreshes on movement

Can I try it?


Absolutely. Simply point your iphone to the brython gallery url:

gallery/geo.html then click add to home screen. You can now launch it like a native application.


What makes it special?


It's a web application, so of course HTML and CSS, but the code is Python. It leverages the new Brython feature to link to a remote python script, instead of having it inline with the html. This allows a clean separation of presentation, logic and eye candy:

The HTML


<!DOCTYPE html>
<html>
    <head>
        <title>Brython test</title>
        <meta charset="iso-8859-1">
        <meta name="viewport" content="user-scalable=no, width=device-width, initial-scale=1,maximum-scale=1">
        <meta name="apple-mobile-web-app-capable" content="yes">
        <script src="../brython.js"></script>
        <script type="text/python" src="navi.py"></script>
        <link rel="stylesheet" type="text/css" href="navi.css" />
        <link rel="apple-touch-icon" href="icon.png"/>
        <link rel="apple-touch-startup-image" href="splash.png">
    </head>
    <body onLoad="brython(2)">
        <div id="header">
            <H1>Your position</H1>
            <div id="switch">
                  <span class="thumb"></span>
                    <input id="refr" type="checkbox" />
                </div>
            </div>
        </div>
        <div id="navarea"></div>
        <div id="maparea"></div>
    </body>
</html>

Your typical iPhone web application, except that there is no jQuery mobile or similar framework. There is no onclick. The only javascript is the brython.js file for Brython itself and the related body onload call of brython().

So let's have a look at the Python code:

The Python


# globals #########################
refr = False
geo = win.navigator.geolocation
watchid = 0


# functions ###########################
def navi(pos):
    xyz = pos.coords

    ul = UL(id="nav")
    ul <= LI('lat: %s' % xyz.latitude)
    ul <= LI('lon: %s' % xyz.longitude)

    mapurl = "http://maps.googleapis.com/maps/api/staticmap?markers=%f,%f&zoom=15&size=320x298&sensor=true" % (xyz.latitude, xyz.longitude)
    img = IMG(src = mapurl, id = "map")
    try:
        doc["nav"].html = ul.html
    except KeyError:
        doc["navarea"] <= ul
    try:
        doc["map"].src = mapurl
    except KeyError:
        doc["maparea"] <= img

def nonavi(error):
    log(error)

def navirefresh(ev):
    global refr, watchid
    refr = False if refr else True
    if refr == True:
        doc["switch"].className = "switch on"
        watchid = geo.watchPosition(navi, nonavi)
    else:
        doc["switch"].className = "switch"
        geo.clearWatch(watchid)

# the setup
if geo:
    geo.getCurrentPosition(navi, nonavi)
    doc["switch"].className = "switch"
    doc["switch"].onclick = navirefresh
else:
    alert('geolocation not supported')

We are setting up 2 callback functions. One called if we have navigation (navi) support, one if we dont (nonavi), and finally a function (navirefresh) to handle the onclick of the auto refresh switch in the title bar of the application. This works pretty decently as a quick and dirty GPS application.

The CSS

The CSS is a bit long so I'm not posting it on the blog, but you can check out the source at the brython.info site or on the SVN repository. The ios style switch CSS is borrowed from this article: ios-5-style-switch-control

The tip of the iceberg

So there you have it. You can now use your favorite language (Python, of course) to write applications for your mobile phone or tablet. This example is slightly iPhone specific (mostly due to CSS), but the same basic structure applies to a variety of mobile devices. And it took no time whatsoever to write this.

@f_dion

Sunday, January 27, 2013

Utopia Python (ou realidade?)

Utopia


Imagine um mundo onde você pode programar em Python, onde que você quer. Sim, ela existe para iPad, Android, iPhone, PC, Unix, Mac, Linux etc. Mas há uma área ...

Navegadores Web


Seria ótimo se nós não tem que usar Javascript. Nós colocamos na nossa página web, algo como:

<script type="text/python">
def lista(num):
    for i in range(num):
        print(i)

lista(10)
</script>

Ou talvez colocar o nosso código em um arquivo e fazer isso:

<script type="text/python" src="codigo.py"></script>


E ter um bom suporte para HTML5, SVG, eventos, callbacks...
Sim, é genial, sem dúvida. De qualquer forma pode parar de sonhar com uma utopia, o que!

Consola Navegador (Firefox fazer Ctrl-Shift-K, Chrome Ctrl-Shift-J, Safari Ctrl-Alt-I): Este é o código Python que foi executado.

Impossível!

É muito possível, graças Brython:

O que é isso?

Veja esta página ( http://www.brython.info/test/test_clock.html ), o você vai ver um relógio analógico. E o código fonte da página? Sim, é um programa em Python!

Sim, eu sei ... deixa sem palavras ...

@f_dion

P.S. Nós Telecharge brython.js aqui: brython/downloads e como usá-lo (english). Lista Brython em português: forum/brython-pt. Esta semana, vou publicar no meu blog um aplicativo para iPhone escrito com Brython.

Friday, January 25, 2013

Brython trouve son code...

Sur le serveur


Jusqu’à maintenant, en parlant de Brython, j'ai mis l'emphase sur le fait que tout roule du cote du client, dans la page web.

Sur ce blog, par exemple, j'inclus même brython.js a même le gabarit de blogger, pour figer la version. Tout est ici.

Et bien sur, le code Python lui meme se retrouve a l'interieur de la balise script:

<script type="text/python">
#le code python va ici
print("Et pourtant elle tourne")
</script>

Mais pourquoi le titre?


C'est pour introduire une nouvelle fonctionnalité de Brython, tout juste sortie du four! On peut maintenant utiliser la syntaxe:

<script type="text/python" src="script.py"></script>

Et le Brython va aller chercher script.py (ou tout autre script python que l'on spécifie) avec un appel ajax, sur le serveur (avec certains navigateurs comme Firefox, en fait meme pas besoin de serveur, on peut faire un file open de la page web et tout fonctionne localement). Sur un serveur, comme c'est avec ajax, bien sur le script se doit d’être sur le même domaine que la page web.

On pourra ainsi séparer notre structure (.html), nos embellissements (.css) et notre logique (.py).

@f_dion

Sidekick 3

RaspberryPi the sidekick


McDonald's is currently advertising that "every hero needs a sidekick". Of course, if you've been following my blog, you already know this for a fact.

In the previous Sidekick articles (sidekick and sidekick 2), we saw how we could run a program on the Raspberry Pi, and the display would then be forwarded to another computer, through the use of X forwarding with ssh (-X).

One side effect of that mode is that the program will detect the X Windows property of the PC, and not the Raspberry Pi. For example, if your X server on your PC supports Open GL, although the Raspberry Pi supports only Open GL ES 2.0, the program will see the full Open GL stack.

It can be a good thing, but sometimes it can lead to surprises. Another limitation is the windowing.

Windowed


When running a single application, this is the best way to use the Raspberry Pi as a sidekick. But don't forget to use the X forwarding, else you get:

pi@raspberrypi ~ $ idle
Traceback (most recent call last):
  File "/usr/bin/idle", line 5, in <module>
    main()
  File "/usr/lib/python2.7/idlelib/
PyShell.py", line 1406, in main
    root = Tk(className="Idle")
  File "/usr/lib/python2.7/lib-tk/Tkinter.py", line 1688, in __init__
    self.tk = _tkinter.create(screenName, baseName, className,
interactive, wantobjects, useTk, sync, use)
_tkinter.TclError: no display name and no $DISPLAY environment variable


If we use ssh -X (or X forwarding in putty), it works as intended:
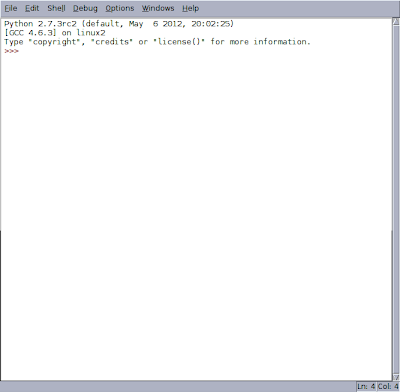
idle main window

And if we go to file and do an open, we see the files that are on the Raspberry Pi. Let me open the quick and dirty cam server we did at the last PyHack workshop (I'm putting the code in text too)


#!/usr/bin/env python

import web

class Images:
    def GET(self):
        typemap = {
        "png":"image/png",
        "jpg":"image/jpeg",
        }
        web.header("Content-Type",typemap["png"])
        return open("fablocker.png","rb").read()

URLS = ( "/secret", Images ,
)

app = web.application(URLS, globals())

if __name__ == "__main__":
    app.run()

 This is just the web server side of things and is using web.py

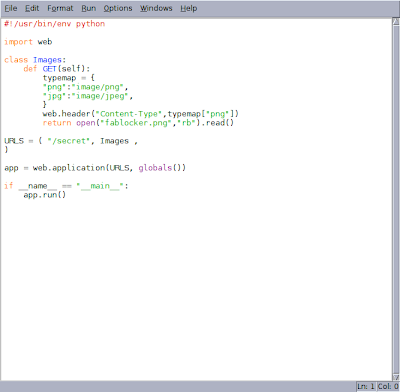
idle new editor window

We now have 2 windows of programs running on the Raspberry Pi, but displaying on our computer's desktop.

But sometimes it's important to have a full desktop. So how do we do this, to see the whole Raspberry Pi desktop?

VNC


The solution is Virtual Network Computing (VNC).

There are many implementations of the protocol, and they fall into 2 camps.
  • The kind that gives you a new desktop (it is not the same as the one that is on the HDMI output)
  • and the kind that attaches to the original desktop.


the client


Before installing the server, let's talk about the client. On your PC, if you have a unix or linux machine, there is a chance that you have a program called vncviewer. Try it and see if you do. If not, you will have to install it. This will depend greatly on what operating system you run, as far as how to do that. If your desktop is a *nix, I'm sure you know how to use your package manager to get vncviewer.

Under Windows you can get tightvnc for windows or you can try the multiplatform (Linux, Solaris, Windows, Mac) RealVNC. Many Mac users are partial to Chicken of the VNC.

tightvnc

Tightvnc is of the first category of servers. This has the advantage that you can get a graphical desktop, even if your Raspberry Pi is on the command line, without X windows started.

First we will have to install it:

$ ssh -X pi@raspberrypi

pi@raspberrypi ~ $ sudo apt-get install tightvncserver
pi@raspberrypi ~ $ tightvncserver :1

You will require a password to access your desktops.

Password:
Verify:
Would you like to enter a view-only password (y/n)? n

New 'X' desktop is raspberrypi:1

Creating default startup script /home/pi/.vnc/xstartup
Starting applications specified in /home/pi/.vnc/xstartup
Log file is /home/pi/.vnc/raspberrypi:1.log

 And that should work, when you access your Pi remotely with a client.

It is also possible with tightvnc to specify a screen resolution that you choose, and it wont have anything to do with the Raspberry Pi screen resolution or your monitor's capability. For example, to get a 1024x768 desktop:

pi@raspberrypi ~ $ tightvncserver -geometry 1024x768 :1

Of course if tightvnc works well for you, you will want to automate the startup of the server. Stewart Watkiss posted the following startup script on elinux.org (would go under /etc/init.d as tightvncserver):

#!/bin/sh
# /etc/init.d/tightvncserver
# Customised by Stewart Watkiss
#http://www.penguintutor.com/linux/tightvnc
# Set the VNCUSER variable to the name of the user
# to start tightvncserver under
VNCUSER='pi'
eval cd ~$VNCUSER
case "$1" in
 start)
   su $VNCUSER -c '/usr/bin/tightvncserver :1'
   echo "Starting TightVNC server for $VNCUSER "
   ;;
 stop)
   pkill Xtightvnc
   echo "Tightvncserver stopped"
   ;;
 *)
   echo "Usage: /etc/init.d/tightvncserver {start|stop}"
   exit 1
   ;;
esac
exit 0

And then under .vnc, a xstartup file that contains the following:

!/bin/sh
xrdb $HOME/.Xresources
xsetroot -solid black
/usr/bin/lxsession -s LXDE &
  
And that should be it. After rebooting, it should start automatically. If you prefer x11vnc, then follow the next set of instructions instead.

x11vnc


x11vnc falls into the second category of servers. It will attach to the X server of the Raspberry Pi. As such, you have to run LXDE, you can't stay in console text mode.

To install it:

$ ssh -X pi@raspberrypi

pi@raspberrypi ~ $ sudo apt-get install x11vnc
pi@raspberrypi ~ $ x11vnc -storepasswd

You'll have to enter a password. Next we need to configure the startup with lxde:

pi@raspberrypi ~ $ cd .config
pi@raspberrypi ~ $ mkdir autostart
pi@raspberrypi ~ $ cd autostart
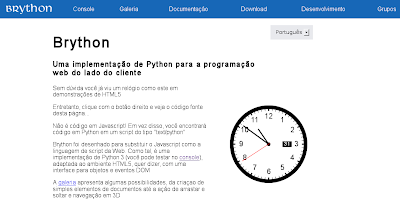
pi@raspberrypi ~ $ wget http://brython.heliohost.org/x11vnc.desktop

Be patient on the last step, this is getting a startup file for x11vnc from my Brython playground site. It is usually pretty busy... Reboot the Pi and you should be set.


Accessing the Pi


Once you have the server running, you run the viewer on your PC, and specify the ip address (or name if you have avahi or the like), you will be greeted with a password prompt. That is the password you defined for the server, earlier:


And then, the desktop!


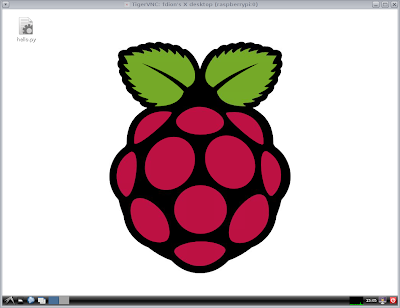
1024x768 Raspbian desktop, from my PC
@f_dion

Tuesday, January 22, 2013

RaspberryPi como servidor web

Cherokee


Hacer la instalación de Cherokee Web Server en el Raspberry Pi con Raspbian es fácil, pero requiere tiempo.

wget http://cherokee-project.com/install && sudo python install
 

Y hay que esperar que la compilación se termina (mas de 30 min., me parece), con éxito (esperamos).

Dinámico


El Pi es pequeño en cuanto a su tamaño, pero también en cuanto a la cantidad de RAM y de core en el CPU. En cuanto a un sitio de tipo dinámico, es posible hacerlo con un Pi, pero hay que pensar en la aplicación. Como servidor personal o de departamento, es bueno.

Pero, y un blog? En mi caso, he notado que a veces hay 75+ visitantes al mismo tiempo. No es razonable esperar que un Pi puede hacerlo de manera dinámica. Por eso, vamos a ver lo que podemos esperar con Cherokee y un contenido estático.

Estático


Primero, voy a iniciar Cherokee:

$ sudo /opt/cherokee/sbin/cherokee -d

Luego voy a configurar el modo automático, pero por ahora es suficiente así.

Debemos poner una pagina como test:

$ cd /opt/cherokee/var/www
$ sudo wget http://raspberry-python.blogspot.com/2013/01/going-in-wrong-direction.html

En mi workstation, tengo apache, con ab:

$ which ab
/usr/bin/ab
$ ab
ab: wrong number of arguments
Usage: ab [options] [http[s]://]hostname[:port]/path
Options are:
    -n requests     Number of requests to perform
    -c concurrency  Number of multiple requests to make
    -t timelimit    Seconds to max. wait for responses
    -b windowsize   Size of TCP send/receive buffer, in bytes
    -p postfile     File containing data to POST. Remember also to set -T
    -u putfile      File containing data to PUT. Remember also to set -T
    -T content-type Content-type header for POSTing, eg.
                    'application/x-www-form-urlencoded'
                    Default is 'text/plain'
    -v verbosity    How much troubleshooting info to print
    -w              Print out results in HTML tables
    -i              Use HEAD instead of GET
    -x attributes   String to insert as table attributes
    -y attributes   String to insert as tr attributes
    -z attributes   String to insert as td or th attributes
    -C attribute    Add cookie, eg. 'Apache=1234. (repeatable)
    -H attribute    Add Arbitrary header line, eg. 'Accept-Encoding: gzip'
                    Inserted after all normal header lines. (repeatable)
    -A attribute    Add Basic WWW Authentication, the attributes
                    are a colon separated username and password.
    -P attribute    Add Basic Proxy Authentication, the attributes
                    are a colon separated username and password.
    -X proxy:port   Proxyserver and port number to use
    -V              Print version number and exit
    -k              Use HTTP KeepAlive feature
    -d              Do not show percentiles served table.
    -S              Do not show confidence estimators and warnings.
    -g filename     Output collected data to gnuplot format file.
    -e filename     Output CSV file with percentages served
    -r              Don't exit on socket receive errors.
    -h              Display usage information (this message)
    -Z ciphersuite  Specify SSL/TLS cipher suite (See openssl ciphers)
    -f protocol     Specify SSL/TLS protocol (SSL2, SSL3, TLS1, or ALL)


Ahora, podemos hacer una simulación de carga.

Vamos a hacer 1000 solicitudes en total (-n), y 75 al mismo tiempo (-c):

$ ab -n 1000 -c 75 -v 1 http://raspberrypi/going-in-wrong-direction.html
This is ApacheBench, Version 2.3 <$Revision: 655654 $>
Copyright 1996 Adam Twiss, Zeus Technology Ltd, http://www.zeustech.net/
Licensed to The Apache Software Foundation, http://www.apache.org/

Benchmarking raspberrypi (be patient)
Completed 100 requests
Completed 200 requests
Completed 300 requests
Completed 400 requests
Completed 500 requests
Completed 600 requests
Completed 700 requests
Completed 800 requests
Completed 900 requests
Completed 1000 requests
Finished 1000 requests

Server Software:        Cherokee/1.2.101
Server Hostname:        raspberrypi
Server Port:            80

Document Path:          /going-in-wrong-direction.html
Document Length:        208790 bytes

Concurrency Level:      75
Time taken for tests:   18.010 seconds
Complete requests:      1000
Failed requests:        0
Write errors:           0
Total transferred:      209724452 bytes
HTML transferred:       209520640 bytes
Requests per second:    55.53 [#/sec] (mean)
Time per request:       1350.741 [ms] (mean)
Time per request:       18.010 [ms] (mean, across all concurrent requests)
Transfer rate:          11372.03 [Kbytes/sec] received

Connection Times (ms)
              min  mean[+/-sd] median   max
Connect:        1   96  36.0    109     128
Processing:   132 1232 266.1   1166    2738
Waiting:       16  182 153.4    126     949
Total:        143 1328 262.7   1278    2853

Percentage of the requests served within a certain time (ms)
  50%   1278
  66%   1320
  75%   1417
  80%   1479
  90%   1671
  95%   1777
  98%   1951
  99%   2060
 100%   2853 (longest request)

Aprobado


Así que, me parece que con contenido estático (quizás generado por medio de Pelican), y con poco imágenes (en el test aquí, ninguna), si, el Raspberry Pi podría servir de servidor de blog.

@f_dion

Monday, January 14, 2013

encabezamientos http

web.py


El sábado pasado, llevamos a cabo un taller PyHack. El tema era sobre cámaras web, pygame y el raspberry pi, como servidor de seguridad vídeo. Y acceso por teléfono a este servidor. Para demostrarlo, utilizamos inicialmente python -m SimpleHTTPServer, pero después, con web.py.

Para salvar tiempo en el taller, busco con google un ejemplo de servidor de imágenes con web.py, y de inmediato encontramos esta pagina:

webpy.org/images

El codigo es asi:

import os
import web 
 
urls = (
'/images/(.*)', 'images'
)  
 
class images:
    def GET(self,name):
        ext = name.split(".")[-1]  # Gather extension

        cType = {
            "png":"images/png",
            "jpg":"images/jpeg",
            "gif":"images/gif",
            "ico":"images/x-icon"            }

        if name in os.listdir('images'):  # Security
            web.header("Content-Type", cType[ext]) 
            return open('images/%s'%name,"rb").read() 
        else:
            raise web.notfound()

Y después de añadir :

app = web.application(urls, globals())

if __name__ == "__main__":
    app.run() 
 
 
no operaba como lo esperamos. Normalmente, no va a descargar las imágenes con un Content-Type (web.header) apropiado, solo mostrarlas en el navegador. Pero aquí, si!

image/jpg


Es lo correcto de poner un Content-Type: image/jpeg, image/png etc. Pero en el código, en el sitio, hay images/jpeg, images/png etc. En vez de salvar tiempo, perdimos mucho sin ver el S extra...

Mi versión es la siguiente (URLS en vez de urls y Images como clase en vez de images, y image/ sin el S extra)

import os
import web

class Images:
    def GET(self,name):
        ext = name.split(".")[-1]  # Gather extension

        cType = {
            "png":"image/png",
            "jpg":"image/jpeg",
            "gif":"image/gif",
            "ico":"image/x-icon"            }

        if name in os.listdir('images'):  # Security
            web.header("Content-Type", cType[ext]) # Set the Header
            return open('images/%s'%name,"rb").read() # Notice 'rb' for reading images
        else:
            raise web.notfound()

URLS = (
'/images/(.*)', Images
)

app = web.application(URLS, globals())

if __name__ == "__main__":
    app.run()


Este código opera correctamente. 

Descargar


Seguimos y añadimos mas hasta que completamos el proyecto (el código sera en bitbucket un poco mas tarde en el mes), y ahora todo esta bien.

Pero, cual es la manera si uno realmente desea ofrecer la descarga de un fichero? Hacer un error de tipo? No.

Hay que añadir un otro encabezamiento http (por medio de web.header) que se llama Content-disposition:

web.header("Content-disposition", "attachment; filename=%s"%name)

@f_dion