Showing posts with label usb. Show all posts

Wednesday, February 13, 2013

Audio numerique sur RaspberryPi

Audiophile

Pour que le Raspberry Pi coute le moins possible, certaines décisions on du être prise. Par exemple, il n'y a pas de CODEC analogique - numérique. De sorte que l'audio se joue par soit:

1) le port HDMI - audio numérique passée directement au téléviseur ou a l'ampli intégré avec décodeur DTS, dolby digital, master audio etc... Si on utilise le Raspberry Pi comme serveur de media, c'est parfait. Mais si on ne peut utiliser le port HDMI?

2) le port 3.5mm analogique - l'audio est générée par PWM (Pulse Width Modulation). Avec une fréquence suffisamment élevée, on peut arriver a 16 bit de résolution, comme les convertisseurs plus conventionnels. Dans le cas du Raspberry Pi toutefois, la résolution est un peu moindre. En plus, il y a un problème avec le pilote ALSA, de sorte que le son n'est pas vraiment... a la hauteur.

USB

Tout n'est pas perdu. En effet, on peut se procurer une carte son sur USB:
Mini PCM2704 USB sur ebay (A noter que le prix est a la hausse, de $4.00 par rapport a ce que j'ai payé ...).

C'est géré par le Raspberry Pi: 

$ lsusb
Bus 001 Device 001: ID 1d6b:0002 Linux Foundation 2.0 root hub
Bus 001 Device 002: ID 0424:9512 Standard Microsystems Corp.
Bus 001 Device 003: ID 0424:ec00 Standard Microsystems Corp.
Bus 001 Device 004: ID 08bb:2704 Texas Instruments Japan

Et ça donne une sortie analogique 3.5mm de qualité (super sur casque d’écoute), une sortie SPDIF rca numérique et une TOSLink optique numérique.
de USB a SPDIF, TOSLink et 3.5mm analogique

Illusion d'optique

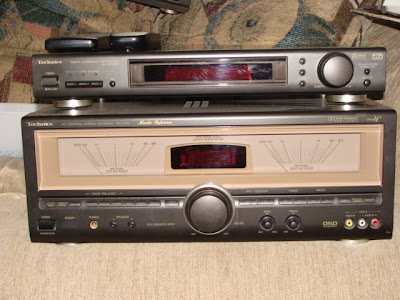
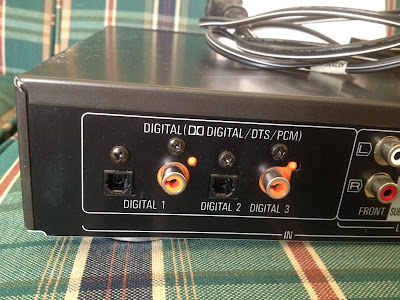
Dans mon cas, je saute le DAC. J'utilise la carte son comme interface numérique optique, qui se relie a un processeur de son numérique Technics SH-AC500D (qui lui se branche a un ampli):

Le processeur de son est sur le dessus

La lumiere au bout ... de la fibre
On branche la fibre sur un des ports TOSlinks

Le soft


mpg123, aplay et d'autres lecteurs audio qui utilisent ALSA vont fonctionner avec la carte, mais il faut effectuer un changement a un fichier de configuration:

$ sudo vi /etc/modprobe.d/alsa-base.conf

et sur la derniere ligne, on change le -2 par un 1:

options snd-usb-audio index=-2
devient
options snd-usb-audio index=0 nrpacks=1
et on reboot.

François
@f_dion

Tuesday, February 5, 2013

Gráficos en la consola

Pygame, RaspberryPi, Webcams.


Pygame utiliza SDL para los gráficos, así que soporta directamente la consola o X windows. Es el caso en todas la plataformas (Unix, Linux, Mac, no solo en Raspbian sobre el RaspberryPi).

Si no conocen nada de Pygame, hay tutoriales en espanol aqui:
razonartificial.com

En mi caso, necesitaba código para capturar imágenes de una webcam (por un taller PyHack). con Python y Pygame, es muy sencillo. Hacer el import y init de los modulos, crear un objeto cam (de resolución 320x240), iniciar la camara, obtener una imagen (cam.get_image), y grabar como png.


import pygame
import pygame.camera  # experimental
from pygame.locals import *

pygame.init()
pygame.camera.init()

cam = pygame.camera.Camera("/dev/video0", (320,240))  # webcam

cam.start()
image = cam.get_image()
pygame.image.save(image,'fablocker.png')
cam.stop()

El mismo código funciona en la consola o el escritorio, perfecto con los cron jobs.


Matplotlib


Hay otros módulos Python que dependen de un servidor X windows. En casos de que no se require OpenGL (no hay en Raspberry Pi) o OpenGL ES, hay un servidor basico que podemos utilizar: xvfb.

Primeramente hay que hacer la instalación de xvfb:


$ sudo apt-get install xvfb


Matplotlib es bueno para hacer imagenes y incluirles en informes de actividad de servidor, por ejemplo. Un servidor web no requiere X windows, asi que porque deberiamos utilizar LXDE o otro escritorio grafico, solo por hacer imagenes que vamos a incluir en una pagina web?

Con xvfb, no hay problemas. Un script que contiene el código Python siguiente (poner en un fichero mpl.py):


from matplotlib.pyplot import *

plot([2,4,2,5,6,3,1])
savefig("graph.png")

Es lo que haria normalmente. Pero si tratamos de ejecutar el script directamente, vamos a recibir un error. A utilizar xvfb, eliminamos el error, así:

$ xvfb-run python mpl.py
  Va a generar un fichero graph.png que se vera asi:


Todo de la consola, sin escritorio gráfico.


François
@f_dion

Wednesday, October 10, 2012

Autoreplicación parte 2

Otra opción posible en cuanto a la autoreplicación (ver la primera parte aquí), es hacer una copia "live" de la carta SD con la cual boot el Pi (/dev/mmcblk0), sobre una otra carta del mismo tamaño o mas (por ejemplo 4GB boot -> carta 4GB o mas).

Aquí tengo una carta todavia no configurada (con raspi-config). Así, hay un mínimo de servicios en operación, y no hay necesidad de poner el sistema operativo en modo "usuario solo". Voy a hacer una otra copia sobre una carta SD en el lector de carta USB (/dev/sda):


Linux raspberrypi 3.2.27+ #160 PREEMPT Mon Sep 17 23:18:42 BST 2012 armv6l

The programs included with the Debian GNU/Linux system are free software;
the exact distribution terms for each program are described in the
individual files in /usr/share/doc/*/copyright.

Debian GNU/Linux comes with ABSOLUTELY NO WARRANTY, to the extent
permitted by applicable law.
/usr/bin/xauth:  file /home/pi/.Xauthority does not exist

NOTICE: the software on this Raspberry Pi has not been fully configured. Please run 'sudo raspi-config'

pi@raspberrypi ~ $ ls /dev/sd*
/dev/sda  /dev/sda1
pi@raspberrypi ~ $ df -h
Filesystem      Size  Used Avail Use% Mounted on
rootfs          1.8G  1.3G  347M  80% /
/dev/root       1.8G  1.3G  347M  80% /
devtmpfs         93M     0   93M   0% /dev
tmpfs            19M  220K   19M   2% /run
tmpfs           5.0M     0  5.0M   0% /run/lock
tmpfs            37M     0   37M   0% /run/shm
/dev/mmcblk0p1   56M   36M   21M  63% /boot
pi@raspberrypi ~ $ time sudo dd bs=1M if=/dev/mmcblk0 of=/dev/sda
3781+1 records in
3781+1 records out
3965190144 bytes (4.0 GB) copied, 793.701 s, 5.0 MB/s

real 13m13.810s
user 0m0.090s


He añadido "time" al frente de sudo dd para saber cuanto tiempo que requiere eso. En comparacion con el metodo de autoreplication del articulo precedente requiere mas o menos 2 veces mas tiempo:


fdion@raspberrypi ~ $ time sudo dd bs=1M if=2012-09-18-wheezy-raspbian.img of=/dev/sda
1850+0 records in
1850+0 records out
1939865600 bytes (1.9 GB) copied, 404.55 s, 4.8 MB/s

real 6m44.632s
user 0m0.020s
sys 0m33.330s


El método directa ("live") es mas lento, pero la ventaja es que no hay necesidad de usar 1.9GB simplemente para tener la imagen. Una vez que uno configura el pi con raspi-config, el método del articulo precedente es la única manera de hacer nuevas cartas. Sino hay riesgo de corrupción.

Tuesday, October 2, 2012

ZFS file system on Raspberry Pi

FISH


I do a good bit of hardware integration with the web, with manufacturing equipment, with embedded systems and with big data set, or that can sustain multiple failures. Not necessarily all at once, but typically, people expect FISH from me :)

FISH is Fully Integrated Software and Hardware (btw, as a side note, the internal project at Sun to create appliances based on ZFS was known as FISHWorks). The Raspberry Pi is a cool piece of hardware, but I typically need stuff that is only (or mostly) found on Solaris and derived OSes, such as ZFS. I've been using ZFS for many years now, since the first public release on Solaris Nevada. ZFS scales and give you data integrity. And it can run on the largest systems known to man.

It scales


For example, I'm listening right now to ZFS Day's live video stream and hearing a talk about ZFS on the Sequoia supercomputer, which is the fastest supercomputer out there. They are using it as a native port, not using FUSE.

What is ZFS? 


Wikipedia: "ZFS is a combined file system and logical volume manager designed by Sun Microsystems. The features of ZFS include data integrity verification against data corruption modes, support for high storage capacities, integration of the concepts of filesystem and volume management, snapshots and copy-on-write clones, continuous integrity checking and automatic repair, RAID-Z and native NFSv4 ACLs. ZFS is implemented as open-source software, licensed under the Common Development and Distribution License (CDDL)."

From Supercomputers to $35 computers


So, ZFS scales at the highest level obviously. Well, it also scales down: I've been using a bit ZFS on the Raspberry Pi using FUSE, until I can get a Solaris derived OS ( such as illumos, smartos, openindiana, opensolaris etc) on the Raspberry Pi. That way, at least I have ZFS. Still missing zones, smf and dtrace, but it is a start.

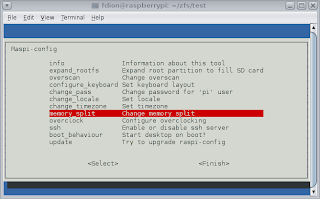
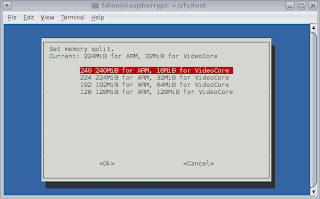
Now just a reminder, the Pi only has 256MB total ram, and a BCM arm processor. So first thing first, we need to give as much ram to the OS as possible, and reduce the video buffer size:


I'm using a 240MB split on that Raspberry Pi since it is running only in text mode at the console, and I remote to it using ssh -X.


If you use the composite out you might want to use the 224MB split and definitely 192 or 128 using HDMI, but then at that point, you are chocking ZFS. That's 128 for OS and ZFS and whatever apps you are running...

Fully loaded


Altough Raspbian comes with a good amount of stuff preloaded, it was not intended to be used with FUSE out of the box, and ZFS was probably never on the radar screen of anybody. So let's start with adding the FUSE stuff and the libraries and tools we will need to build ZFS. This is the shortlist:


fdion@raspberrypi ~/zfs $ sudo apt-get install fuse-utils libfuse-dev libfuse2
fdion@raspberrypi ~/zfs $ sudo apt-get install libaio-dev libattr1-dev attr
fdion@raspberrypi ~/zfs $ sudo apt-get install git scons


If you build it...


So we have the prerequisites. Let's get the code, compile it and install the tools:


fdion@raspberrypi ~ $ mkdir zfs
fdion@raspberrypi ~ $ cd zfs
fdion@raspberrypi ~/zfs $ git clone https://bitbucket.org/cli/zfs-fuse-arm.git
fdion@raspberrypi ~/zfs $ cd zfs-fuse-arm/
fdion@raspberrypi ~/zfs/zfs-fuse-arm $ cd src
fdion@raspberrypi ~/zfs/zfs-fuse-arm/src $ scons
[a lot of stuff will scroll by]
fdion@raspberrypi ~/zfs/zfs-fuse-arm/src $ sudo scons install
[again, more stuff will scroll by]

Wow, it compiled (scons). And installed (sudo scons install). It's a good thing we are using the zfs-fuse-arm version, because the mainline wont go very far on the compile.

A demonstration, if you please? 


Well of course! Let's start the zfs-fuse daemon and create two virtual disks. I'm creating two 100M disks here using dd/ (this is on a slow SD card, rated 10MB/s). You could also use an actual /dev (like a pair of USB keys):


fdion@raspberrypi ~/zfs/zfs-fuse-arm/src/zfs-fuse $ sudo sh run.sh &

fdion@raspberrypi ~/zfs/zfs-fuse-arm/src/zfs-fuse $ cd
fdion@raspberrypi ~ $ cd zfs
fdion@raspberrypi ~/zfs $ mkdir test
fdion@raspberrypi ~/zfs $ cd test
fdion@raspberrypi ~/zfs/test $ dd if=/dev/zero of=fakedisk1 bs=1024k count=100
100+0 records in
100+0 records out
104857600 bytes (105 MB) copied, 10.2747 s, 10.2 MB/s
fdion@raspberrypi ~/zfs/test $ dd if=/dev/zero of=fakedisk2 bs=1024k count=100
100+0 records in
100+0 records out
104857600 bytes (105 MB) copied, 10.7517 s, 9.8 MB/s

Up to now we haven't done anything with ZFS per say. And basically to mirror two drives in ZFS and create a new storage out of that, all we have to do:


fdion@raspberrypi ~/zfs/test $ sudo zpool create mymirror mirror /home/fdion/zfs/test/fakedisk1 /home/fdion/zfs/test/fakedisk2


Now let's create a filesystem on that new zpool device, and mount it to a local folder in my home directory, change permissions so I can write to it and finally copy some files from /etc to my new filesystem:


fdion@raspberrypi ~/zfs/test $ cd
fdion@raspberrypi ~ $ mkdir myfilesystem
fdion@raspberrypi ~ $ sudo zfs create mymirror/myfilesystem -o mountpoint=/home/fdion/myfilesystem
fdion@raspberrypi ~ $ sudo chown fdion:pi myfilesystem/
fdion@raspberrypi ~/myfilesystem $ cp /etc/*.conf .
cp: cannot open `/etc/fuse.conf' for reading: Permission denied
fdion@raspberrypi ~/myfilesystem $ ls
adduser.conf          gssapi_mech.conf  libaudit.conf   pnm2ppa.conf
asound.conf           hdparm.conf       logrotate.conf  resolv.conf
ca-certificates.conf  host.conf         mke2fs.conf     rsyslog.conf
colord.conf           idmapd.conf       mtools.conf     sensors3.conf
debconf.conf          insserv.conf      nsswitch.conf   sysctl.conf
deluser.conf          ld.so.conf        ntp.conf        ts.conf
gai.conf              libao.conf        pam.conf        ucf.conf
fdion@raspberrypi ~/myfilesystem $ sudo zfs list
NAME                    USED  AVAIL  REFER  MOUNTPOINT
mymirror                191K  63.3M    22K  /mymirror
mymirror/myfilesystem  89.5K  63.3M  89.5K  /home/fdion/myfilesystem
fdion@raspberrypi ~/myfilesystem $ sudo zpool list
NAME       SIZE  ALLOC   FREE    CAP  DEDUP  HEALTH  ALTROOT
mymirror  95.5M   196K  95.3M     0%  1.00x  ONLINE  -
fdion@raspberrypi ~/myfilesystem $ 


How cool is that? I now have a mirrored backup of my .conf files. Well, not quite. We are using fake disks, so if the SD card dies I loose all.

So next time we'll demo with actual USB drives.

Sunday, September 23, 2012

Day 2

Keyboard


In the previous article, entitled Day 1, we talked about the SD card as item #2.

The next item on our list was a keyboard. This one is relatively easy, but as always it is a good idea to look at the official list before buying one. The main thing to look at is the power consumption. You will want one that draws 100 mA or less from the USB bus.

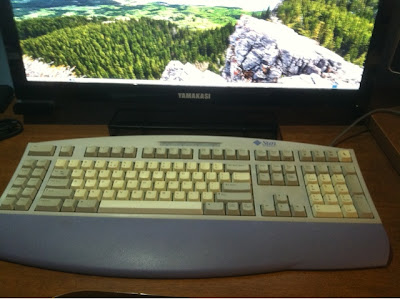
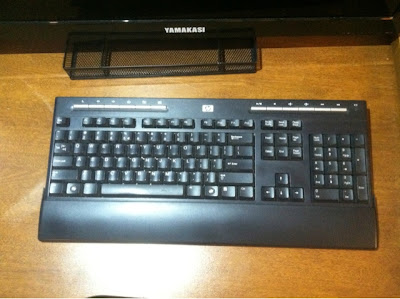
Most USB keyboards work without a problem, most Dell, HP, Logitech etc, including this classic Sun type 6 USB:


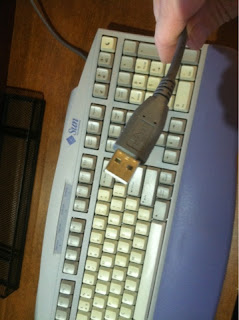
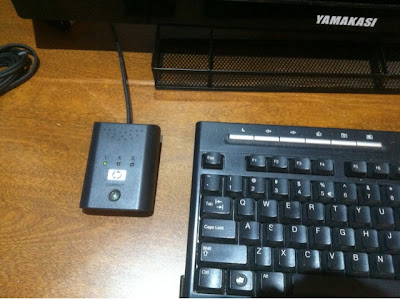
But wait... USB? that is right. PS/2 keyboards won't work, as the Raspberry Pi doesn't have a ps/2 port. A USB keyboard has a cable like this:


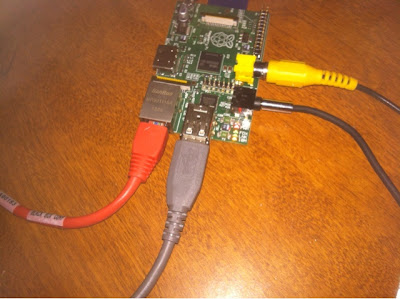
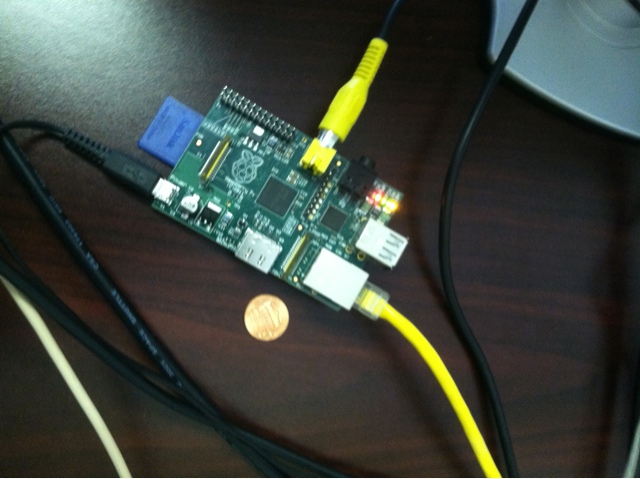
And that end is simply connected to the Raspberry Pi's USB port (one or the other, it doesn't matter). Shown here, the grey cable at the bottom (red is network, black is audio and yellow is video):


But it is also possible to use a wireless keyboard, such as this one:


These have a USB dongle, sometimes with a button. Another advantage is that they also come bundled with a mouse. They use a proprietary protocol, but as far as the computer goes, it sees a regular USB keyboard.


There is one more keyboard type available that can be used with the Pi, and that is the Bluetooth keyboard (shown with a Bluetooth dongle):


 This is both more expensive and harder to use so we will cover that in the future when we talk about Bluetooth.

Next up, the TV.

Saturday, September 15, 2012

Day 1

SD Card

In the previous article, entitled Day 0, we talked about all the stuff you need before your Raspberry Pi can be up and running. We talked about the power supply as item #1.

Item #2 was the SD memory card (in blue on the picture):


This is the equivalent to a hard disk on a computer, for your raspberry pi. The official distribution (operating system), raspbian wheezy, requires a minimum of a 2GB SD card. These can be had for a few $. Less than $5 at any rate. But it is not worth the time. Start at least with 4GB. Considering that an 8GB card is to be found in brick and mortar stores for $8 and a 16GB for $14 (i'm writing this in september 2012), I'd even go with 8 or 16 if this is more than a toy.

If you go with a different distribution, such as the adafruit Occidentalis distro, then you have no choice but to go with 4GB as the minimum, and there it makes also a lot of sense to get an 8GB or 16GB card.

Having said that, there are also specialized distributions, one trick ponies so to speak, that can fit on 1GB and 2GB cards. It all depends what you want to do with your Pi.

Beside the capacity, you'll want to get the right speed, or "class". For example the blue sandisk 16GB on the picture above is a class 4 card. That is a minimum speed, imho. If you can get class 6 or 10, that is even better:


This one is a SanDisk 16GB also, but a class 10 that promises 30MB/s and that's a good thing.


Buyer Beware


Before rushing out and buying a card, I do want to mention a few things.

1. Not all cards are compatible. Check the LIST and make sure that it is supported. I've never had any problem with any SanDisk or AData cards with the Raspberry Pi, but apparently some people have had issues.

2. You will need a way to write the SD card. That means either an on board SD card slot (such as on the Mac mini and mac books) or a USB SD card reader like this:


This should work with Windows, Solaris / OpenIndiana, Linux and Mac OS/X. Typically, I've found that a lot of embedded SD slots, such as found on Sony Vaio (with the secondary slot for MagicGate) and Dell Precision laptops, tend to not create reliable images, under any OS. The USB on the other hand seems solid. In the end, the embedded SD slot on my Mac Mini seems rock solid as far as that, so I tend to stick to that.

3. The steps to copy the operating system software image to the SD card is a bit involved. If that scares you, there is another option:

Buy a card that already has the OS on it. This can be found on forums, through your local hackerspace, your local Linux user group, ebay, electronic distributors (in the case of Adafruit, they sell SD cards with their own distribution, Occidentalis, already installed) or online shops that specialize in the Raspberry Pi. You can also check the LIST for some other suggestions.

So, we are making some progress... Next time, we'll talk about the keyboard.


Thursday, September 13, 2012

Day 0

Someone told me IRL that I was putting the cart before the horse, that I should really have at least one or two posts that explain how to get started with the raspberry pi.

So, here is what you will need to do if you are interested in getting one, but don't know where to start:

1. Buy a raspberry pi. You can do this online, there are a few distributors. Go to raspberry.org to figure out which one to use, based on your country. Or maybe your local hackerspace is doing group buys on them, check them out.
2. Wait a while until you get one delivered to your door.

Seriously, it will take a while, so in the meantime, start shopping or digging around for the other stuff you will need. At a minimum, you will need:

1. A 5v micro usb power supply
2. A 4GB SD CARD
3. A USB keyboard
4. An old tv or color monitor with composite (RCA) in.

It will make things nicer if you also get:
5. A USB mouse
6. A USB hub
7. A wifi dongle
8. A case
9. A USB drive
10. ...

Instead of 4, an HDMI monitor might be a better option, particularly if the Raspberry Pi will be used as a full time desktop computer. The Pi doesn't support VGA directly, but an active adapter can be bought (expensive).

Yes, the $35 computer can cost twice that or more depending on the options.

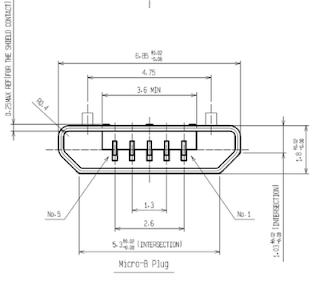
So, today, we will address point #1, the power supply. Physically, the plug needs to be a micro USB and electrically, it needs to deliver 5V at 700 mA or more (0.7 A). Look around, you probably have a cell phone power supply that will work.

I've used Blackberry Power supplies, quite appropriate for a Raspberry...

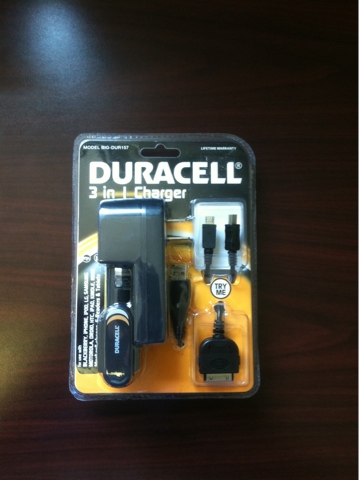
But another option I am quite fond of is the Duracell 3 in 1 charger. I've not seen anybody mentioning it anywhere, but i've been using a few for months now and they work well.


It has adapters for iPhone and iPad, motorola, kindle, nook, samsung, lg, blackberry etc.


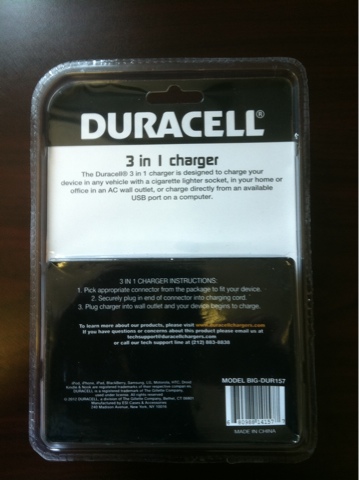
It is 3 in 1 because you can use it from the wall socket, from 12V (in a car or a solar kit) or from a USB port, including a battery pack (that part is not included). It puts out 4.75V to 5.25V at around 1 A. Perfect match for the RPi.


The tip to use is the micro USB.


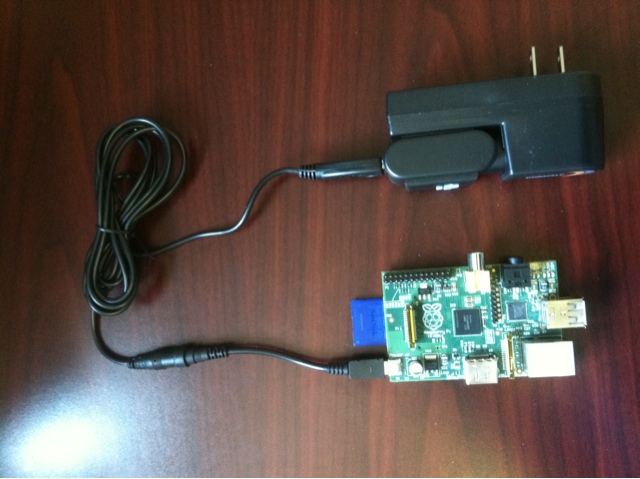
So, once everything is connected together, you'll get this:


It sells online for about $13 to $20 but in local discount retail stores (in the USA) I've found them for about $12, so it pays to shop around. If you know of an equivalent product in your neck of the woods, drop us a note in a comment!

Next on our list will be the SD card...

Friday, August 17, 2012