Showing posts with label apple. Show all posts

Monday, January 28, 2013

iPhone app with Python

Thanks to Brython


Brython GPS icon


Native? Not quite...


The application launches with a splashscreen, like it should

Splash page

But it is really a web application.

Tracking my progress
Automatically refreshes on movement

Can I try it?


Absolutely. Simply point your iphone to the brython gallery url:

gallery/geo.html then click add to home screen. You can now launch it like a native application.


What makes it special?


It's a web application, so of course HTML and CSS, but the code is Python. It leverages the new Brython feature to link to a remote python script, instead of having it inline with the html. This allows a clean separation of presentation, logic and eye candy:

The HTML


<!DOCTYPE html>
<html>
    <head>
        <title>Brython test</title>
        <meta charset="iso-8859-1">
        <meta name="viewport" content="user-scalable=no, width=device-width, initial-scale=1,maximum-scale=1">
        <meta name="apple-mobile-web-app-capable" content="yes">
        <script src="../brython.js"></script>
        <script type="text/python" src="navi.py"></script>
        <link rel="stylesheet" type="text/css" href="navi.css" />
        <link rel="apple-touch-icon" href="icon.png"/>
        <link rel="apple-touch-startup-image" href="splash.png">
    </head>
    <body onLoad="brython(2)">
        <div id="header">
            <H1>Your position</H1>
            <div id="switch">
                  <span class="thumb"></span>
                    <input id="refr" type="checkbox" />
                </div>
            </div>
        </div>
        <div id="navarea"></div>
        <div id="maparea"></div>
    </body>
</html>

Your typical iPhone web application, except that there is no jQuery mobile or similar framework. There is no onclick. The only javascript is the brython.js file for Brython itself and the related body onload call of brython().

So let's have a look at the Python code:

The Python


# globals #########################
refr = False
geo = win.navigator.geolocation
watchid = 0


# functions ###########################
def navi(pos):
    xyz = pos.coords

    ul = UL(id="nav")
    ul <= LI('lat: %s' % xyz.latitude)
    ul <= LI('lon: %s' % xyz.longitude)

    mapurl = "http://maps.googleapis.com/maps/api/staticmap?markers=%f,%f&zoom=15&size=320x298&sensor=true" % (xyz.latitude, xyz.longitude)
    img = IMG(src = mapurl, id = "map")
    try:
        doc["nav"].html = ul.html
    except KeyError:
        doc["navarea"] <= ul
    try:
        doc["map"].src = mapurl
    except KeyError:
        doc["maparea"] <= img

def nonavi(error):
    log(error)

def navirefresh(ev):
    global refr, watchid
    refr = False if refr else True
    if refr == True:
        doc["switch"].className = "switch on"
        watchid = geo.watchPosition(navi, nonavi)
    else:
        doc["switch"].className = "switch"
        geo.clearWatch(watchid)

# the setup
if geo:
    geo.getCurrentPosition(navi, nonavi)
    doc["switch"].className = "switch"
    doc["switch"].onclick = navirefresh
else:
    alert('geolocation not supported')

We are setting up 2 callback functions. One called if we have navigation (navi) support, one if we dont (nonavi), and finally a function (navirefresh) to handle the onclick of the auto refresh switch in the title bar of the application. This works pretty decently as a quick and dirty GPS application.

The CSS

The CSS is a bit long so I'm not posting it on the blog, but you can check out the source at the brython.info site or on the SVN repository. The ios style switch CSS is borrowed from this article: ios-5-style-switch-control

The tip of the iceberg

So there you have it. You can now use your favorite language (Python, of course) to write applications for your mobile phone or tablet. This example is slightly iPhone specific (mostly due to CSS), but the same basic structure applies to a variety of mobile devices. And it took no time whatsoever to write this.

@f_dion

Sunday, January 20, 2013

Going in the wrong direction

$35 going once


XYZ is the new RaspberryPi. Replace XYZ by several small form computers that have hit the market in the past year (particularly those powered by ARM). That is the claim being made again and again.

Except that the Pi is small, and a lot of the contenders are bigger. Or dont have gpios. And we re not talking about embedded systems. We need an OS. And Python. But really, at the end of the day, they cost too much. How much is too much I hear you say...

We are already conditioned to a $35 price tag. A fully capable Linux computer with a fast GPU and gpios. And a DSI and CSI connector. You can bring more to the table, such as ADC, PWM, USB3, bluetooth or sata, but if the price is greater, then you are going in the wrong direction.

$35 going twice


To put things in perspective as to what $35 buys you, at a local retailer, an Arduino Uno (an embedded system, so in theory it should be cheaper) will set me back $35, and then I have to add a $40 ethernet shield if I want to get it on the network. I go to Barnes and Nobles, and I cant find a decent computer science book for that amount. So yes, the Raspberry Pi foundation set the bar high.

Yet, it is impossible to ignore that. And the fact is that while $35 got you a 256MB Pi model B some months back, it now gets you a 512MB Pi model B.

Sold for $25


Just as we got comfortable with the Raspberry Pi model B, we are about to get a $25 version, with a lower power consumption. For a lot of projects, the model B was already overkill, so the model A will really further increase the perceived value of the Raspberry Pi platform.

What's the deal?


Why does it matter? Because at that price level, we don't mind losing one in an experiment. That means that, no matter how young or old, we all have an opportunity to try something we would never have done if the Pi cost $100 or even $80, and even less so if we had to use a $1000 computer...

Let me illustrate. As a teenager, I almost cut short my career in technology. I was working with a friend on building a robot, controlled by an Apple ][ compatible. Even though it was not the real deal (it was a clone), that computer was very expensive to us (over $1000). But we had no other way. And all our knowledge came from books at the library or bulletin board systems. There was no world wide web. But hey, we found out that the game port not only had digital and analog inputs (for analog joysticks), it also had digital outputs (annunciator 0- 3):

Apple 16-pin DIP Game Port socket (on the motherboard)
  for II, II+, IIe, IIgs


                           =========
Pushbutton 3 (GS only)  9 | *     * | 8  Ground
 Gm Ctrl 1 (Stick-1 Y) 10 | *     * | 7  Gm Ctrl 2 (Stick-2 X)
 Gm Ctrl 3 (Stick-2 Y) 11 | *     * | 6  Gm Ctrl 0 (Stick-1 X)
        Annunciator 3  12 | *     * | 5  /$C040 Strobe
        Annunciator 2  13 | *     * | 4  Pushbutton 2
        Annunciator 1  14 | *     * | 3  Pushbutton 1
        Annunciator 0  15 | *     * | 2  Pushbutton 0
        No Connection  16 | *     * | 1  +5V
                           ===| |===
                               ^
                        Notch on socket
                (faces toward front of computer)

Still, we were a little concerned in hacking the expensive machine. And sure enough, during our experimenting over many weeks, we melted one of the trace on the motherboard. Smoke. Bad smell. Angry mom. Sad friend with a busted Apple ][ compatible. Well, the story does have a happy ending in that we were able to repair the computer and we both continued experimenting and going each our way in the field of technology, but I'm not sure what would have happened had we not been able to fix the computer...

That is why we need $25 computers. It wouldn't surprise me if we see $20, or even sub $20 computers... If you were thinking $60, then as I mentionned, you are going in the wrong direction.

Food for thought


Now that we've cleared this point up, makers of Raspberry Pi add-ons, you're the next contestants on the price is right.  

Are you going in the wrong direction?


@f_dion

Wednesday, December 12, 2012

Bonjour / zeroconf / Avahi

Zeroconf

Zeroconf é um conjunto de técnicas que criam de forma automática uma rede IP (TCP,UDP...) sem necessitar de configuração ou servidores. Bonjour é a mais largamente adotada solução Zeroconf, encontrado em cada Apple Mac.

Avahi

Avahi é uma implementação livre do Zeroconf que inclui um sistema para multicast DNS/DNS-SD.


Instalação


pi@rpi ~ $ sudo apt-get install avahi-daemon
pi@rpi ~ $ sudo insserv avahi-daemon

pi@rpi ~ $ sudo vi /etc/avahi/services/multiple.service

salvar este para o arquivo multiple.service:
<?xml version="1.0" standalone='no'?><!--*-nxml-*-->
<!DOCTYPE service-group SYSTEM "avahi-service.dtd">
<service-group>
<name replace-wildcards="yes">%h</name>
<service>
<type>_device-info._tcp</type>
<port>0</port>
<txt-record>model=RackMac</txt-record>
</service>
<service>
<type>_http._tcp</type>
<port>80</port>
</service>
<service>
<type>_ssh._tcp</type>
<port>22</port>
</service>
<service>
<type>_sftp-ssh._tcp</type>
<port>22</port>
</service>
</service-group>

Depois: 
pi@rpi ~ $ sudo /etc/init.d/avahi-daemon restart

Unix / Mac

Podemos agora conectar remotamente de um Mac (o Solaris / OpenIndiana), usando o seguinte comando:

ssh pi@rpi.local

Windows

Com o Windows, instalar este programa também:

Bonjour (Apple)

Use Putty em vez de ssh.

Wednesday, October 24, 2012

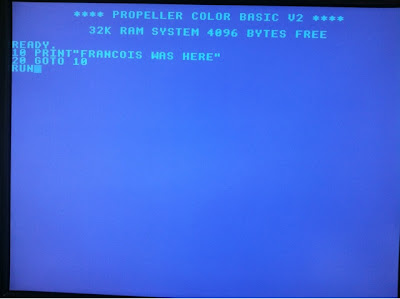
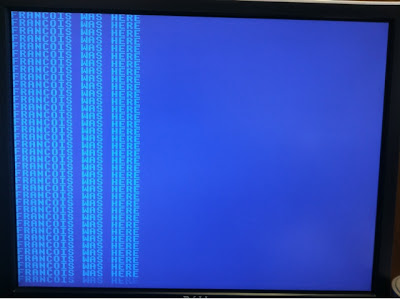
Blue Screen Of Basic


Last hardware I featured was for the Apple fans. This one is for the Commodore fans.


Tonight on Masterpiece Mystery:


See my next post on the subject.

Saturday, October 20, 2012

The solution

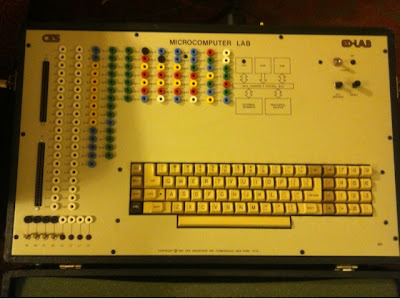
It is a CES Industries Ed-Lab Microcomputer Lab model # 804.

That was a mouthful. It was made in 1982 (that's 30 years old!, for those math impaired), and was based on a Franklin Ace 1000 microcomputer, itself a clone of the Apple ][ Plus, but with an interesting enhancement: lower case support for the display and a caps lock / shift key that worked. It also had a full keypad.

If you strip away the special expansion card and the fancy case, it was pretty close to the Apple ][ some of you might have played with in the early 80s. I remember doing conversions to HEX code from 6502 assembler by hand, and typing that straight into the monitor (that was the call -151 reference on hint #2). And one thing that was extremely cool with computers from that era: instant on. Power on, hit break / reset and start coding right away. Of course, back then Python wasn't even thought of, so at the prompt, it was the Basic programming language that was king. And we had no choice but to understand the hardware and the software to really use these to the full. Thank you, Woz.


So who got it right?


Bob Rosenbloom sent the following: "ED LAB microcomputer training systems with a Franklin motherboard and video card."

I asked how he figured it out and he said:

"I've had them in the past. The banana jacks gave it away. I still have many of their analog and digital trainers, including one based on the Intel 8085."

However, the first (and only) to identify correctly the correct motherboard (Franklin Ace), even before seing the innards was ukscone on the Raspberrypi.org forum. And the first to correctly identify the specific Ace model was LC, who left a comment on hint #4.

It was quite interesting to see the various guesses and the interest this topic stirred. This post wraps it all up.

The recap


If you want to review all the hints:


Hint#1

Hint#2
 
Hint#3

Hint#4
 
Hint#5

In a future post, I'll talk about what I had to do to make it operational again, and what I still have to do, such as fixing the video modulator board / 80 column card (to remove the vertical lines) and fix the case itself. Another interesting story that needs to be told also is that of the Franklin computer itself. As for CES, I'm still researching that part.