This article continues documenting one of the
PYPTUG Workshops:
PyHack Workshop #01, and goes into writing the
PiQuizMachine code.
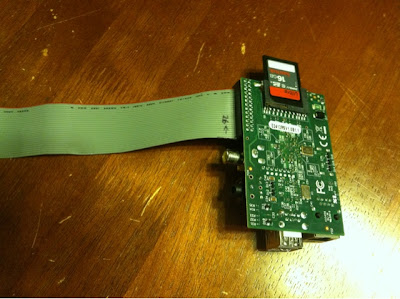
The machine
.JPG) |
The PiQuizMachine
|
The Circuit
Each button controller is made from 1/2" PVC parts and a momentary mini push button, connected by a wire to a board.
On the board, one 10K Ohm resistor pulls up the GPIO to high, while the push button is connected to the GPIO on one end and to ground through a 1K Ohm resistor on the other end.
This last resistor is optional if
you are certain you can avoid pressing the buttons whenever the GPIOs are configured as outputs instead of inputs...
 |
| This circuit is repeated for all 4 buttons |
Source Code
Make sure you've installed Mercurial and pulled the code from bitbucket (as instructed
in the previous article), and go into:
    $ cd fablocker/PyHack/workshop01
    $ cd trivia
    $ ls
    load.py  piquiz.py  piquizmachine.py  questions.txt  README.md short.txt
The
load.py is the first piece of code we will review.
We have a text file (question.txt) with all the questions and answers for the quiz game. We generated this file using a python script to web-scrape the data from a few pages of triviachamp.com (you can also do this by hand, selecting all the questions on a screen, and copy-pasting into a text file).
There is also a shorter version, with 2 questions / answers. We will use that first to figure out how we will load them into memory in our program.
Here is the content of short.txt:
 Louis Leterrier - This film was released in 2010.Who directed Clash of the Titans?

     a. Rodrigo Garcia
     b. Louis Leterrier
     c. Joe Carnahan
     d. Iain Softley


 Chicago - This team is part of the NFL.If you wanted to see the Bears play football, which city would you need to visit?

     a. Chicago
     b. Houston
     c. San Diego
     d. Denver
Wow... So what do we have here? We do not have the data nicely separated by a special delimiter or by a new line. We will have to figure out a way to ignore the blank lines, handle the slight variations and extract the data into various fields:
answer - trivia blah blah.question blah blah?
multiple choices of answers
The thing is, the trivia and question can have all kinds of punctuation marks such as comma, period, dash and varying amount of white spaces. Doing this by hand coding a function to do it would be a lot of work and quite boring.
There is something that can deal with this fairly easily. I'm referring again to Python's "batteries included", a library called re, for Regular Expressions.
Regular Expressions
Regular Expressions (
abbreviated as re, regex or regexp), is a language designed to create simple to complex matching against data ( a string or a file). It is about as much the opposite to Python as can be, as it is dense, hard to read and hard to debug.
But sometimes, it is the perfect solution to a problem, and it is fairly easy to use in the Python implementation (a full implementation on Python, just like in Perl -
in some other languages, it is a partial implementation, and can be hard to use or at least way more involved).
At any rate, if you ever have a career in IT, chances are you will have to become familiar with them, from system administrators wanting to parse log files, to programmers doing EDI, to web developers doing URL matching (
Django, Web.py, even config files for certain web servers), to loading and extracting data from a file that is not 100% structured to be read by a computer (as we will do here).
The official documentation of the
re module can be found at
docs.python.org
A quick cheat sheet on regular expressions can be found here at
tartley.com
And for those who like to follow video tutorials, check out
this google video tutorial by Nick Parlante, on youtube.
Let's now look at the code in load.py:
1:  #!/usr/bin/env python
2:  # -*- coding: utf-8 -*-
3:  """
4:  load.py - just loading the question file
5:  Loads questions and answers from quiz data file. It follows the format
6:  from triviachamp.com
7:  """
8:  # vim: tabstop=8 expandtab shiftwidth=4 softtabstop=4
9:
10:  import re
11:
12:  with open('short.txt', 'r') as f:
13:    for line in f:
14:      if len(line) > 1:
15:        match = re.search(r'^([\w ]+)-([\w ,-]+)\.(.+)', line)
16:        if match:
17:          answer = match.group(1).strip()
18:          trivia = match.group(2).strip()
19:          question = match.group(3).strip()
20:          choices = []
21:        else:
22:          match = re.search(r'\s+(\w)\.([\w ,-]+)', line)
23:          if match:
24:            choices.append(match.group().strip())
25:            choice = match.group(1)
26:            description = match.group(2).strip()
27:            if description == answer:
28:              correct_response = choice
29:            if choice == 'd':
30:              print(question, choices[0], choices[1],
31:                   choices[2], choices[3],
32:                   correct_response, trivia)
33:
Line 1 through 7 are typical of what we've done for the past several scripts, with the exception of line 2. On that line we specify that this document or script is following not ASCII, not ISO8859-1 but UTF-8 for the encoding of the characters. In this particular case we do not need it, but if we had to use accented letters, or special glyphs (
for a card game, the heart, spade, diamond and clover glyphs, for example) then we would need this. Python 3 defaults to UTF-8, so it is a good idea to start learning about unicode and UTF-8, even though we are writing Python 2.x code right now. Line 8 is simply some instructions for an editor named vim.
Line 10 is where we import the regular expression module we just discussed. This is part of the Python library, so no need to download anything. This follows the "batteries included" pattern of Python. For general programming, you typically dont need to download anything else. For domain specific applications however, you will need to download and install other modules (like web.py, matplotlib, pygame, scipy etc)
Line 12, we are opening a file named short.txt, in the 'r' (or read) mode.
12: with open('short.txt', 'r') as f:
This is quite alien looking for some having a background in another language, such as C. In fact, it is also possible to open a file this way:
f = open('short.txt', 'r')
However, by using the statement
with, we get exception handling and graceful housekeeping for free. We dont have to use try, except and finally, it is done implicitly. So just use this form.
Line 13, we have a for loop, and just like we did with the PINS in the previous article, we are getting items from an object. For PINS it was either a tuple or a list, both of which can be iterated by a for loop. In this case, we use a file object named f, which we obtained by calling open(). This is different than, say, a file descriptor in C/C++ (which is what fopen() in these languages would return) where it is only a reference to be used by other functions to do stuff. In Python, it is an object that, when an iteration is requested, will give us one item. For files, it will be one line. We could have also used a different variable name:
for blah in file would get me a whole line in variable blah.
Line 14, we use a
built-in, len() to tell us if we are dealing with an actual line with some data, or just a blank line, based on the length of the line.
Let me isolate the next 5 lines so we can focus on them:
15:        match = re.search(r'^([\w ]+)-([\w ,-]+)\.(.+)', line)
16:        if match:
17:          answer = match.group(1).strip()
18:          trivia = match.group(2).strip()
19:          question = match.group(3).strip()
Now, the scary part, line 15. The regular expression. You'll just have to trust me that it works as intended. In the workshop I couldn't go into all the details. Similarly, this article would be way too long if I did, but I'll try to do it anyway... The actual regular expression is this:
^([\w ]+)-([\w ,-]+)\.(.+)
The caret (^) is to start the match at the beginning of the line. The first group in parenthesis will match an alphanumeric character (\w) or a space (anything listed between the two square braces), while the + says to repeat it for as long as you can:
([\w ]+)
But we also follow this with a dash (-) and so it will stop the first group just before the dash. This separates the answer, from the trivia about the answer. The square brackets delimit a set of what characters should match (
think of it as a Python list with no commas). This is convenient, because in the second group, we want to get the trivia, which includes not only alphanumeric or 'word characters', but also spaces commas and dashes:
([\w ,-]+)
The + repeats the match until the next rule, the period. It has to be escaped, because a period means match any character. We want it to match an actual period, so we escape it with a backslash (\). The last group uses the period to match any character and wont stop until the end of the line.
To actually use this whole regular expression in our Python code, we have to put it in a string. In python we can use the single or double quote mark for strings ( 'a_string' , "also_a_string" ).
In this case however, not just any string, a raw string. We do this by adding a r at the beginning:
r'a_string'. That way we do not have to escape the backslash. And we pass that, along with our line to the search() function of the re module.
This returns a match object only if there is an actual match, so we have to test for existence of such on line 16, before we can use it on lines 17-19. There, we get the data from the groups we defined (defined in the regular expression by the parenthesis pairs) and assign them to variables: answer, trivia and question.
Wow, lots of explanation for
only 5 lines of code! But that is the nature of the regular expression beast. As I said, often, it is not the answer, but when it is, we just have to live with its denseness...
Line 20 is just setting up (or clearing) a list to store the
multiple choice answers that will follow. Yes, that is right, we haven't dealt with those yet...
Line 21 is the else tied to the existence of a match. Basically, if we couldn't match the first regular expression we wrote, that means we are probably dealing with one of the multiple choice answers. This next part could have been done without regular expressions, but since we spent all this time explaining them, let's use them again on line 22, this time with only 2 groups defined. The first will have the a-d letter and the second the description.
Line 23, we test again for a match. Line 24, we get the match.group() without specifying which of the group we want. By doing this, we get the whole match. We further use the strip() function to remove any leading or trailing white spaces, and we then append this to our choices list. Initially it is empty, and we add to it the multiple choices until the last choice (d).
Let me put the last piece of code repeated here:
25:            choice = match.group(1)
26:            description = match.group(2).strip()
27:            if description == answer:
28:              correct_response = choice
29:            if choice == 'd':
30:              print(question, choices[0], choices[1],
31:                   choices[2], choices[3],
32:                   correct_response, trivia)
Here, on line 25 we get the letter (a-d) assigned to choice. We then get the description on line 26 (using strip() again to remove leading and trailing white spaces). We can then use this description to compare it (line 27) to the answer we picked up earlier. If the answer is on that line, we then assign to correct_response that letter.
Furthermore, if we are on the last line of the multiple choice answers, we are now ready to either store the whole group of question, choices, correct response and trivia, or in this case (lines 30-32) to print it.
We could also have passed the file to the regular expression and write a single regular expression getting all the data we wanted on multiple lines at once, but the sheer complexity of it would have rendered this tutorial useless.
Simple Quiz
In
piquiz.py, we keep things simple (relatively... !) again. It is a basis that can be evolved into something a bit more interesting. Just a straight script, a trivia game in 50 lines of code (a little bare bone obviously with no scoring):
1:  #!/usr/bin/env python
2:  # -*- coding: utf-8 -*-
3:  """
4:  PiQuizMachine - A quiz game for the Raspberry Pi.
5:  Loads questions and answers from quiz data file. It follows the format
6:  from triviachamp.com
7:  """
8:  # vim: tabstop=8 expandtab shiftwidth=4 softtabstop=4
9:
10:  import re
11:  import random
12:
13:  data = []
14:  with open('questions.txt', 'r') as f:
15:    for line in f:
16:      if len(line) > 1:
17:        match = re.search(r'^([\w ]+)-([\w ,-]+)\.(.+)', line)
18:        if match:
19:          answer = match.group(1).strip()
20:          trivia = match.group(2).strip()
21:          question = match.group(3).strip()
22:          choices = []
23:        else:
24:          match = re.search(r'\s+(\w)\.([\w ,-]+)', line)
25:          if match:
26:            choices.append(match.group().strip())
27:            choice = match.group(1)
28:            description = match.group(2).strip()
29:            if description == answer:
30:              correct_response = choice
31:            if choice == 'd':
32:              entry = (question, choices[0], choices[1],
33:                   choices[2], choices[3],
34:                   correct_response, trivia)
35:              data.append(entry)
36:
37:  random.shuffle(data)
38:  for question,choice_a,choice_b,choice_c,choice_d,\
39:      correct_response,trivia in data:
40:    print question
41:    print choice_a
42:    print choice_b
43:    print choice_c
44:    print choice_d
45:    team_answer = raw_input("Your answer:")
46:    if team_answer == correct_response:
47:      print "That is correct, the answer is",correct_response
48:      print trivia
49:    else:
50:      print "Not correct."
Up to line 31, it is almost the same as we already discussed (but using the full size questions.txt file). 32-34, instead of printing, we now store this entry into a list named data, which we initialized empty on line 13.
We are now going to randomize or shuffle the list of questions on line 37. On line 11 we imported the random module which includes a shuffle function. This is very convenient for games, not just for a quiz, but really interesting for a card game. We could define a card deck as a list, then shuffle it.
On line 38 and 39 (the backslash makes it as if it was a single line), we now loop through all the questions in the data list using a for loop. We then print the question and multiple choices on lines 40 through 44. I'm using a print syntax of a statement, but make note that starting with Python 3, print is a function. The next code example uses the print() function syntax (works in python 2.7 and 3). Lines 38-44: This can all be coded in a prettier way, but in order to keep this as simple as I can, I just did it by specifying all the fields so it is very obvious what we are doing.
Line 45 allows us to get an answer from a
keyboard, with a prompt of "Your answer:". We check if the answer is correct on line 46 and if so print a message and the trivia tied to the answer on lines 47 and 48. If the answer was wrong (else) we print a different message on line 50.
So that is the
basic core of a quiz program.
The Real Deal
Combining the code we've done in the button/quiz*.py scripts in the previous article, with the code above, we have all the ingredients to make an interactive quiz machine, one where each of the four teams or players gets a game controller, and will be able to "buzz" in first to answer, much as in TV games, such as Jeopardy or Family Feud.
This code was designed to teach about Python and GPIOs for a workshop and it is what I would call "squeaky clean". It is kept on purpose simple, yet demoes several key features of Python and the GPIOs.
The code was run through pep8 and pylint and is properly documented and formatted (even having 2 blank lines between functions, no use of ; etc), is quite verbose (
several things were done in multiple lines but in normal use I would probably do as one) and yet, is
less than 100 physical lines of code.
1:  #!/usr/bin/env python
2:  # -*- coding: utf-8 -*-
3:  """
4:  PiQuizMachine - A quiz game for the Raspberry Pi.
5:  Loads questions and answers from quiz data file. It follows the format
6:  from triviachamp.com. Lock out through pushbutton controllers
7:  """
8:
9:  __author__ = "Francois Dion"
10:  __email__ = "francois.dion@gmail.com"
11:
12:  import re
13:  import random
14:  import RPi.GPIO as gpio
15:
16:  PINS = (22, 23, 24, 25) # list of pins as tuple
17:  OFFSET = 21 # team number to GPIO pin offset
18:
19:
20:  def loadtrivia(filename):
21:    """ Load the trivia into a list, after extracting the fields """
22:    data = []
23:    with open(filename, 'r') as f:
24:      for line in f:
25:        if len(line) > 1:
26:          match = re.search(r'^([\w ]+)-([\w ,-]+)\.(.+)', line)
27:          if match:
28:            answer = match.group(1).strip()
29:            trivia = match.group(2).strip()
30:            question = match.group(3).strip()
31:            choices = []
32:          else:
33:            match = re.search(r'\s+(\w)\.([\w ,-]+)', line)
34:            if match:
35:              choices.append(match.group().strip())
36:              choice = match.group(1)
37:              description = match.group(2).strip()
38:              if description == answer:
39:                correct_response = choice
40:              if choice == 'd':
41:                entry = (question, choices[0], choices[1],
42:                     choices[2], choices[3],
43:                     correct_response, trivia)
44:                data.append(entry)
45:    return data
46:
47:
48:  def getteam(lockedout):
49:    """ figure out which team presses their button first """
50:    poll = [pin for pin in PINS if pin - OFFSET not in lockedout]
51:    while True:
52:      buttons = [gpio.input(pin) for pin in poll] # list comprehension
53:      if False in buttons: # at least one button was pressed
54:        if buttons.count(False) == 1:
55:          return buttons.index(False) + 1
56:        else: # trouble, multiple buttons
57:          teams = [i for i, b in enumerate(buttons) if b is False]
58:          return random.choice(teams)
59:
60:
61:  def main():
62:    """ our main program """
63:    data = loadtrivia('questions.txt')
64:
65:    gpio.setmode(gpio.BCM) # broadcom mode, by GPIO
66:    for pin in PINS:
67:      gpio.setup(pin, gpio.IN) # set pins as INput
68:    random.shuffle(data)
69:    for question, choice_a, choice_b, choice_c, choice_d, \
70:        correct_response, trivia in data:
71:      # if we wanted to make a graphical game using pygame
72:      # we would replace the print statements below
73:      print(question)
74:      print(choice_a)
75:      print(choice_b)
76:      print(choice_c)
77:      print(choice_d)
78:      lockedout = [] # we start with no team locked out
79:      while len(lockedout) < 4:
80:        team = getteam(lockedout)
81:        prompt = "Your answer, team {0}? ".format(team)
82:        team_answer = raw_input(prompt) # get an answer
83:        if team_answer == correct_response:
84:          print("That is correct, the answer is:")
85:          print(correct_response)
86:          print(trivia)
87:          print("")
88:          lockedout = [1, 2, 3, 4]
89:        else:
90:          print("That is not the answer.")
91:          lockedout.append(team)
92:
93:
94:  if __name__ == "__main__":
95:    try:
96:      main()
97:    except KeyboardInterrupt:
98:      print("Goodbye")
99:      gpio.cleanup()
Lines 1 to 16 should be familiar. I did add two variables for author and email. This is just a convention some people do in their code. Line 17 I'm defining an offset between the team number (1,2,3,4) and the GPIOs (22,23,24,25).
Lines 20 through 45 is the code from the previous example, but put into a function that accepts a file name for the quiz data and that upon execution, will return a list containing all our questions.
lines 48 through 58 is our quiz4.py code from the previous article, put into a function, but with a twist:
On line 52, instead of using directly the PINS tuple, we filter it first on line 50 to see which pins we should really poll. When getteam() is called, a list of teams that have been locked out is provided. We are not even going to check these teams button controllers, because they answered this question already, with a wrong answer.
50: poll = [pin for pin in PINS if pin - OFFSET not in lockedout]
So, what is happening here merits an explanation. You've probably recognized this as a list comprehension (which we've introduced in the previous article). But it looks strange... Let's read it. We will add to this list a pin, from an iteration of the PINS tuple (containing 22,23,24,25), but we will do this only if the pin minus the offset (21) is not in the list of locked out teams. So, if we take 22 - 21, that is 1. If team 1 is locked out, the list stays empty and continues on to the next value and test it. So on and so forth.
I mentioned earlier we had just touched the tip of the list comprehensions. here we went a little deeper, but it goes on.
Lines 51-58,
we loop until a button is pressed. If only one button was pressed at the exact same time, we are good to go, and return which of the teams (1 - 4) pressed the button first. But
trouble is looming on the horizon. It is possible for 2 or more buttons to be pressed
at the exact same moment.
We thus have to introduce some random process to select one of those that have been captured as pressed. We do that on lines 57 and 58. 58 uses the choice() function of the random module (imported on line 13), but 57 requires some explanation, for those who are just starting with Python:
57: teams = [i + 1 for i, b in enumerate(buttons) if b is False]
We want to generate a list of all the teams that had pressed their buttons. buttons is a list containing something like [False, True, True, False], indicating here that team 1 and 4 pressed their button at the same time.
What I now want is a list containing [1, 4] to select randomly from it. So what we do is to use a built in function called enumerate() on that buttons list. This returns the index (
starting at zero) and the value, so we capture this with a for i, b. We will assign i (the zero based index) + 1 (to get a team number) to the list, but only if b (the value) is False. There, that wasn't so bad, after all!
We are now ready for our main() function, lines 61 to 91 (only 30 lines).
On line 63 we load the data from the file
questions.txt
Lines 65-67, we set up the GPIOs, as we've done in
quiz4.py.
Lines 68-77 is the logic we had in our previous example:
piquiz.py
At line 78, we initialize the list of locked out teams to be empty, and start a loop on line 79 that will go on until we have 4 teams locked out by 4 wrong answers, or a right answer (which forces all 4 teams to be locked out).
Line 80 is where we poll the button controllers until we have somebody pressing a button.
81:        prompt = "Your answer, team {0}? ".format(team)
82:        team_answer = raw_input(prompt) # get an answer
Lines 81 and 82 are asking for an answer from the team that pushed their button first. This answer is given using the keyboard. Line 81 could also have been written as:
prompt = "Your answer, team " + str(team) + "?"
This is closer to what is done in other languages, but each concatenation with + creates a new resulting object. As such, it is a less efficient way of doing it, and if used in a loop with lots of data, will consume a lot of memory and be slow.
lines 83-88 handle a correct answer (concluding by locking out all teams to force a new question), while lines 89-91handle a wrong one, adding that one team to the list of locked out teams (passed to the function on line 80)
94:  if __name__ == "__main__":
95:    try:
96:      main()
97:    except KeyboardInterrupt:
98:      print("Goodbye")
99:      gpio.cleanup()
Lines 94-99 repeat the safeguard pattern we established in our previous article, in
quiz4.py on lines 21-25
There you go, a
complete game with Raspberry Pi GPIO hardware integration, that can be played with friends, in less than 100 lines of python code.
 |
| Team 2 is smoking! Two correct answers in a row |
Conclusion
I've avoided classes and methods
on purpose. These would have complicated things too much for the workshop audience (which ranged from teenagers to adults and from some who had never programmed in python, to some who had written a good bit).
Several also had a background in basic and shell scripts, so I did a good bit as straight scripts, without functions, waiting to the end to introduce these concepts. I've also added a bit more code than in the workshop in order to provide a better reference after the fact.
I hope it is useful to others, and if you are in the area, make sure to keep an eye for our next PyHack Workshop. Let me know if I've provided enough details, what things I could have explained more etc.


.JPG)





.JPG)


.JPG)
.JPG)
.JPG)
.JPG)

