C'est un jeu d'enfant
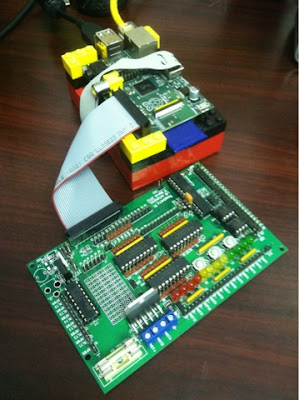
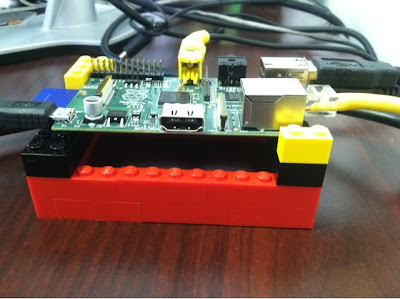
Vous aimez le petit support en lego? J'ai trouvé quelques pièces, pas
assez pour faire un boitier, mais assez pour faire un support.
Mais, bon, mon Raspberry Pi s'ennuyait tout seul, il lui fallait donc un copain.
Le copain l'Arduino
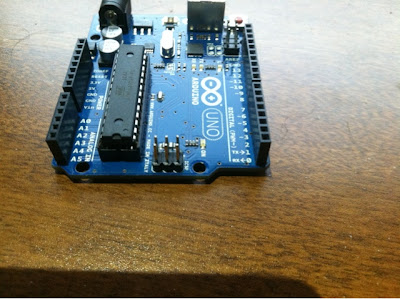
C'est un Arduino uno. J'en utilise une bonne quantité de ces petits boards a la sauce
atmega328. D'ailleurs ce matin, 10 de Octobre, je m'en suis procuré d'autres, a
seulement $20 l’unité chez un revendeur sur Amazon - ça c'est vendu en
quelques minutes a ce prix. Ca se trouve aussi moins cher, a $15, mais il faut alors attendre des semaines car cela vient de Chine.
C'est une plateforme libre utilisant des microcontrôleurs Atmel, Arduino se référant a la plateforme avec son interface pour carte filles, et Uno a un des modèles.
Je travaille en ce moment sur un projet international avec des Arduino (mon 7ieme projet commercial de ce type) et je vais probablement en commencer un autre vers la fin du mois qui lui ne va pas rester sur Arduino. Le prototype sera sur Arduino, mais le produit final, ce sera sur le même microcontroleur Atmel Atmega328 avec une carte mère spécialisée.
Quand j'ai commencé avec les microcontrôleurs dans les années 90, il fallait tout faire soit même, et ecrire tout en code machine. Altera, Xilinx, PIC... Maintenant, avec les
Arduino Uno et les
Parallax Propeller c'est assez simple, c'est comme jouer avec des Lego :)
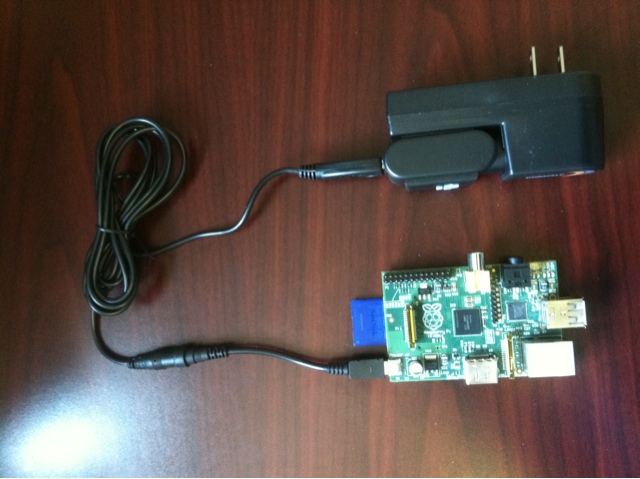
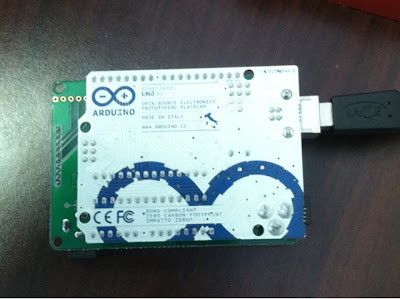
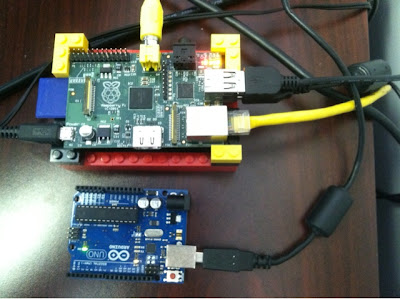
Ca se branche par le port USB (ou serie). Mon alimentation du Raspberry Pi (une alimentation de mobile Blackberry de 700mA) est suffisante pour alimenter le Arduino uno directement par le port USB:
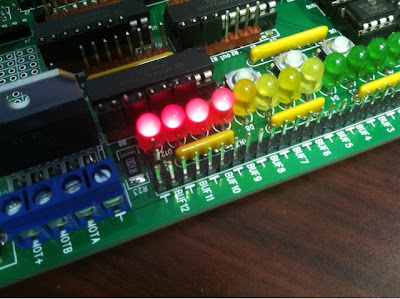
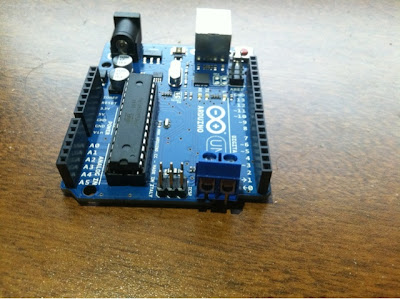
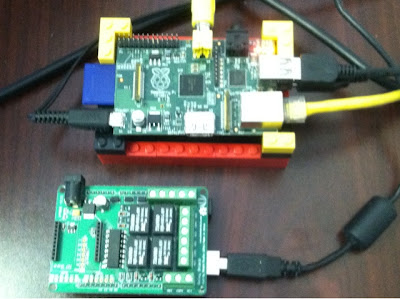
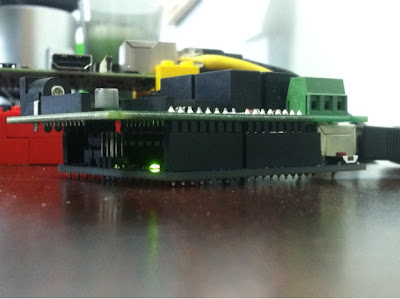
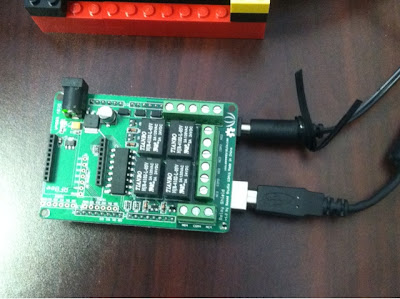
Par contre si on branche un "shield" (c'est ainsi que l'on appelle les cartes filles en langage Arduino), il n'y a pas assez de jus pour alimenter le shield, sa LED reste éteinte (mais le Arduino lui est ok):
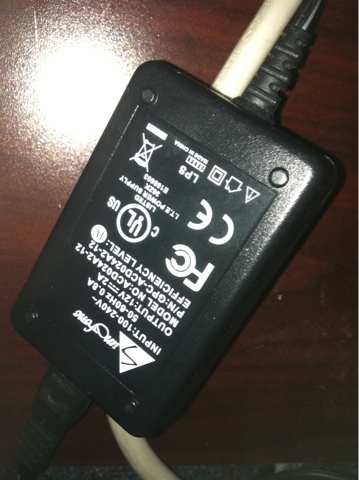
Il faudra donc utiliser une alimentation externe pour cela. Le arduino peut etre alimenter en 5V par USB ou en externe en 7V-12V. Donc ceci fera bien l'affaire, 12VDC 2A:
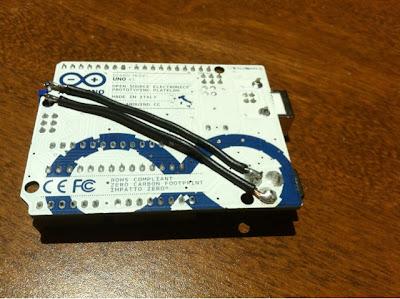
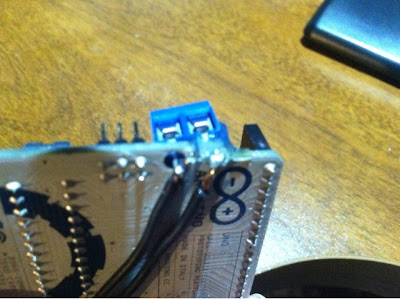
Je le branche directement a l'Arduino. J'aurais pu le connecter au shield lui-même, mais il y a un avantage a faire cela. Vous allez voir plus bas.
On verifie que le Uno est bien vu par le Raspberry Pi:
pi@raspberrypi ~ $ lsusb
Bus 001 Device 001: ID 1d6b:0002 Linux Foundation 2.0 root hub
Bus 001 Device 002: ID 0424:9512 Standard Microsystems Corp.
Bus 001 Device 003: ID 0424:ec00 Standard Microsystems Corp.
Bus 001 Device 009: ID 2341:0043 Arduino SA Uno R3 (CDC ACM)
pi@raspberrypi ~ $
L'installation
Avant de faire l'installation du logiciel, du compilateur, de l'environnement de développement pour l'Arduino, on s'assure que Raspbian est bien a jour en faisant un ap-get update (deux fois au cas ou):
Linux raspberrypi 3.2.27+ #160 PREEMPT Mon Sep 17 23:18:42 BST 2012 armv6l

The programs included with the Debian GNU/Linux system are free software;
the exact distribution terms for each program are described in the
individual files in /usr/share/doc/*/copyright.

Debian GNU/Linux comes with ABSOLUTELY NO WARRANTY, to the extent
permitted by applicable law.

pi@raspberrypi ~ $ sudo apt-get update
Get:1 http://mirrordirector.raspbian.org wheezy InRelease [12.5 kB]
Get:2 http://archive.raspberrypi.org wheezy InRelease [7,665 B]
Get:3 http://mirrordirector.raspbian.org wheezy/main armhf Packages [7,376 kB]
Get:4 http://archive.raspberrypi.org wheezy/main armhf Packages [5,738 B]
Ign http://archive.raspberrypi.org wheezy/main Translation-en_GB
Ign http://archive.raspberrypi.org wheezy/main Translation-en
Get:5 http://mirrordirector.raspbian.org wheezy/contrib armhf Packages [23.3 kB]
Get:6 http://mirrordirector.raspbian.org wheezy/non-free armhf Packages [46.4 kB]
Get:7 http://mirrordirector.raspbian.org wheezy/rpi armhf Packages [14 B]
Ign http://mirrordirector.raspbian.org wheezy/contrib Translation-en_GB
Ign http://mirrordirector.raspbian.org wheezy/contrib Translation-en
Ign http://mirrordirector.raspbian.org wheezy/main Translation-en_GB
Ign http://mirrordirector.raspbian.org wheezy/main Translation-en
Ign http://mirrordirector.raspbian.org wheezy/non-free Translation-en_GB
Ign http://mirrordirector.raspbian.org wheezy/non-free Translation-en
Ign http://mirrordirector.raspbian.org wheezy/rpi Translation-en_GB
Ign http://mirrordirector.raspbian.org wheezy/rpi Translation-en
Fetched 7,471 kB in 40s (183 kB/s)
Reading package lists... Done
pi@raspberrypi ~ $ sudo apt-get update
Hit http://archive.raspberrypi.org wheezy InRelease
Hit http://mirrordirector.raspbian.org wheezy InRelease
Hit http://archive.raspberrypi.org wheezy/main armhf Packages
Hit http://mirrordirector.raspbian.org wheezy/main armhf Packages
Hit http://mirrordirector.raspbian.org wheezy/contrib armhf Packages
Hit http://mirrordirector.raspbian.org wheezy/non-free armhf Packages
Hit http://mirrordirector.raspbian.org wheezy/rpi armhf Packages
Ign http://archive.raspberrypi.org wheezy/main Translation-en_GB
Ign http://archive.raspberrypi.org wheezy/main Translation-en
Ign http://mirrordirector.raspbian.org wheezy/contrib Translation-en_GB
Ign http://mirrordirector.raspbian.org wheezy/contrib Translation-en
Ign http://mirrordirector.raspbian.org wheezy/main Translation-en_GB
Ign http://mirrordirector.raspbian.org wheezy/main Translation-en
Ign http://mirrordirector.raspbian.org wheezy/non-free Translation-en_GB
Ign http://mirrordirector.raspbian.org wheezy/non-free Translation-en
Ign http://mirrordirector.raspbian.org wheezy/rpi Translation-en_GB
Ign http://mirrordirector.raspbian.org wheezy/rpi Translation-en
Reading package lists... Done
pi@raspberrypi ~ $
Je suis a jour, et pas besoin de faire de
apt-get upgrade.
Maintenant on fait l'installation. C'est d'une simplicite choquante, apt-get install arduino!
pi@raspberrypi ~ $ sudo apt-get install arduino
Reading package lists... Done
Building dependency tree
Reading state information... Done
The following extra packages will be installed:
  arduino-core avr-libc avrdude binutils-avr ca-certificates-java default-jre
  default-jre-headless extra-xdg-menus gcc-avr icedtea-6-jre-cacao
  icedtea-netx icedtea-netx-common java-common libatk-wrapper-java
  libatk-wrapper-java-jni libftdi1 libjna-java libnspr4 libnss3 libnss3-1d
  librxtx-java openjdk-6-jre openjdk-6-jre-headless openjdk-6-jre-lib
  ttf-dejavu-extra tzdata-java
Suggested packages:
  arduino-mk avrdude-doc task-c-devel gcc-doc gcc-4.2 equivs libjna-java-doc
  icedtea-plugin libnss-mdns sun-java6-fonts fonts-ipafont-gothic
  fonts-ipafont-mincho ttf-wqy-microhei ttf-wqy-zenhei ttf-indic-fonts
Recommended packages:
  icedtea-6-jre-jamvm
The following NEW packages will be installed:
  arduino arduino-core avr-libc avrdude binutils-avr ca-certificates-java
  default-jre default-jre-headless extra-xdg-menus gcc-avr icedtea-6-jre-cacao
  icedtea-netx icedtea-netx-common java-common libatk-wrapper-java
  libatk-wrapper-java-jni libftdi1 libjna-java libnspr4 libnss3 libnss3-1d
  librxtx-java openjdk-6-jre openjdk-6-jre-headless openjdk-6-jre-lib
  ttf-dejavu-extra tzdata-java
0 upgraded, 27 newly installed, 0 to remove and 0 not upgraded.
Need to get 58.3 MB of archives.
After this operation, 173 MB of additional disk space will be used.
Do you want to continue [Y/n]?
[et on y va... longue liste]
On nous suggere d'autres archives, on les installe au cas ou:
pi@raspberrypi ~ $ sudo apt-get install arduino-mk avrdude-doc equivs libjna-java-doc icedtea-plugin libnss-mdns fonts-ipafont-gothic fonts-ipafont-mincho ttf-wqy-microhei ttf-wqy-zenhei ttf-indic-fonts
Reading package lists... Done
Building dependency tree
Reading state information... Done
The following extra packages will be installed:
  autopoint avahi-daemon bind9-host debhelper fonts-beng fonts-beng-extra
  fonts-deva fonts-deva-extra fonts-gubbi fonts-gujr fonts-gujr-extra
  fonts-guru fonts-guru-extra fonts-indic fonts-knda fonts-knda-extra
  fonts-lohit-beng-assamese fonts-lohit-beng-bengali fonts-lohit-deva
  fonts-lohit-gujr fonts-lohit-guru fonts-lohit-knda fonts-lohit-mlym
  fonts-lohit-orya fonts-lohit-taml fonts-lohit-telu fonts-mlym fonts-nakula
  fonts-navilu fonts-orya fonts-orya-extra fonts-pagul fonts-sahadeva
  fonts-samyak-gujr fonts-samyak-taml fonts-smc fonts-taml fonts-telu
  fonts-telu-extra geoip-database gettext git git-man html2text
  icedtea-6-plugin intltool-debian libavahi-core7 libbind9-80
  libconfig-yaml-perl libcurl3-gnutls libdns81 liberror-perl libgeoip1
  libgettextpo0 libisc83 libisccc80 libisccfg82 liblwres80
  libmail-sendmail-perl libsys-hostname-long-perl libunistring0
  libyaml-libyaml-perl libyaml-perl perl-doc po-debconf rsync
Suggested packages:
  avahi-autoipd doc-base dh-make gettext-doc git-daemon-run
  git-daemon-sysvinit git-doc git-el git-arch git-cvs git-svn git-email
  git-gui gitk gitweb geoip-bin libyaml-shell-perl groff libmail-box-perl
The following NEW packages will be installed:
  arduino-mk autopoint avahi-daemon avrdude-doc bind9-host debhelper equivs
  fonts-beng fonts-beng-extra fonts-deva fonts-deva-extra fonts-gubbi
  fonts-gujr fonts-gujr-extra fonts-guru fonts-guru-extra fonts-indic
  fonts-ipafont-gothic fonts-ipafont-mincho fonts-knda fonts-knda-extra
  fonts-lohit-beng-assamese fonts-lohit-beng-bengali fonts-lohit-deva
  fonts-lohit-gujr fonts-lohit-guru fonts-lohit-knda fonts-lohit-mlym
  fonts-lohit-orya fonts-lohit-taml fonts-lohit-telu fonts-mlym fonts-nakula
  fonts-navilu fonts-orya fonts-orya-extra fonts-pagul fonts-sahadeva
  fonts-samyak-gujr fonts-samyak-taml fonts-smc fonts-taml fonts-telu
  fonts-telu-extra geoip-database gettext git git-man html2text
  icedtea-6-plugin icedtea-plugin intltool-debian libavahi-core7 libbind9-80
  libconfig-yaml-perl libcurl3-gnutls libdns81 liberror-perl libgeoip1
  libgettextpo0 libisc83 libisccc80 libisccfg82 libjna-java-doc liblwres80
  libmail-sendmail-perl libnss-mdns libsys-hostname-long-perl libunistring0
  libyaml-libyaml-perl libyaml-perl perl-doc po-debconf rsync ttf-indic-fonts
  ttf-wqy-microhei ttf-wqy-zenhei
0 upgraded, 77 newly installed, 0 to remove and 43 not upgraded.
Need to get 49.1 MB of archives.
After this operation, 116 MB of additional disk space will be used.
Do you want to continue [Y/n]?
[et on y va... une autre longue liste]
On y va
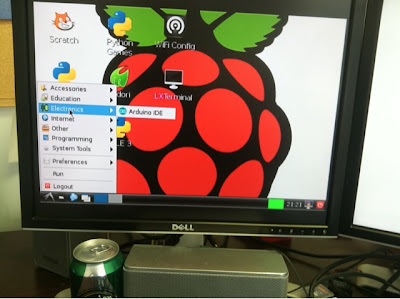
Une fois installé on peut voir sous electronics, le Arduino IDE dans le menu LXDE:
On peut aussi lancer par la ligne de commande l'environnement en tapant:
arduino
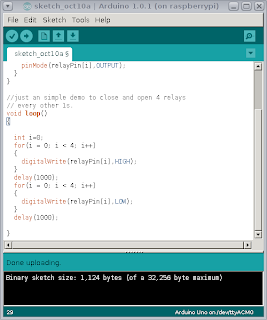
D'ailleurs, si on accède a notre Raspberry Pi par l'entremise d'un PC et de ssh -X, l'IDE s'affiche alors sur notre PC, mais roule sur le Raspberry Pi. Une fois que l'on a écrit du code Wiring (du C avec des fonctions spéciales genre analogWrite, digitalWrite etc), on clique sur le bouton avec la coche pour compiler.
Pour transférer le programme executable sur l'Arduino, on clique sur la flèche qui pointe vers la droite. Les relais vont commencer a travailler du moment que le programme est transféré.
Finalement, l'avantage d'avoir l'alimentation sur le Arduino, c'est que l'on peut retirer le Raspberry Pi et notre programme continue de rouler sur l'Arduino, activant les relais sans problemes.
Finalement, il ne s'agit que d'un exemple bien simple. On peut aussi controler l'Arduino avec Firmata (un protocole de communication) et le module Python PyFirmata.
Aussi, de façon générale, je contrôle les relais directement du Raspberry Pi, mais ça, c'est pour une autre fois.





.JPG)
