Showing posts with label c64. Show all posts

Saturday, January 18, 2025

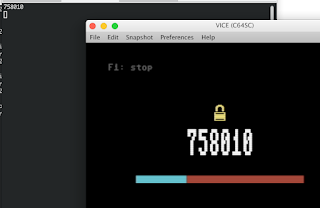
The "35-cent" Commodore 64 softmodem

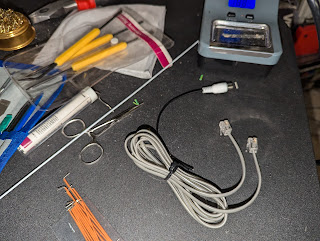
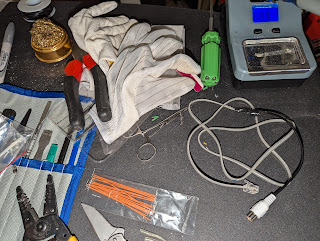
Rockwell famously used 6502-based cores in modems for many years, but that doesn't mean other 6502s couldn't be used. If only there were a way to connect a Commodore 64's audio output directly to an RJ-11 plug ...
Of the many interesting posts from Usenet's more golden days, one of my favourites was John Iannetta's "35-cent modem," where the SID chip provides one-way data modulation to a receiving modem connected via the C64's sound output. While I remember him posting it back in 1998, I never actually tried it at the time.

Wouldn't you know it, but it came to mind the other day when I was looking at a recent haul of Convergent WorkSlate stuff I've got to catalogue. Officially the WorkSlate's only means of telecommunications is its 300 baud internal modem. While we have a 9600bps way of wiring up a Workslate to a modern computer, it's always nice to have a simpler alternative, and I figured this would be a great challenge to see if John's old program could let my Commodore SX-64 talk to my WorkSlate. Spoiler alert: it works!

Saturday, November 16, 2024

One-parting some Commodore 64 utilities for fun and profit

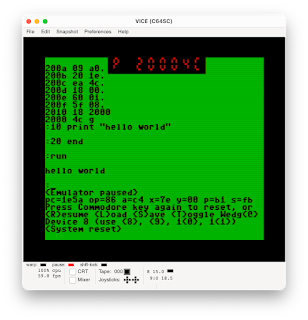
I've got a few retrocomputing bucket list items I'm slowly working down, and a couple of them involve some little Commodore 64 games I've had kicking around on the backburner. However, every game needs media assets, and while there are many great tools for doing art on your present-day workstation and exporting it, sometimes you just want what you used to work with — in as convenient and quick-loading a way as possible that blends with modern emulation workflows. So here's two I tweaked and one-parted — Ultrafont+ and DOODLE! — and some tips for making self-contained tools like these yourself.

Saturday, April 27, 2024

Virtualizing the 6502 on a 6502 with 6o6 (and The Incredible KIMplement goes 1.0)

Okay, promises, promises. Here's the first of my bucket list projects I'm completing which I've intermittently worked on for literally two decades. Now that I've finally shaken out more bugs, tuned it up and cleaned it off, it's time to let people play with the source code.
This is the official 1.0 release of the Incredible KIMplement, an emulator of the one kilobyte, 1MHz MOS/Commodore KIM-1 6502-based single board computer. It provides access to the KIM's built-in TTY support (even through your computer's real serial port) and has expanded RAM with 16K of addressing space, all on an unexpanded stock Commodore 64.

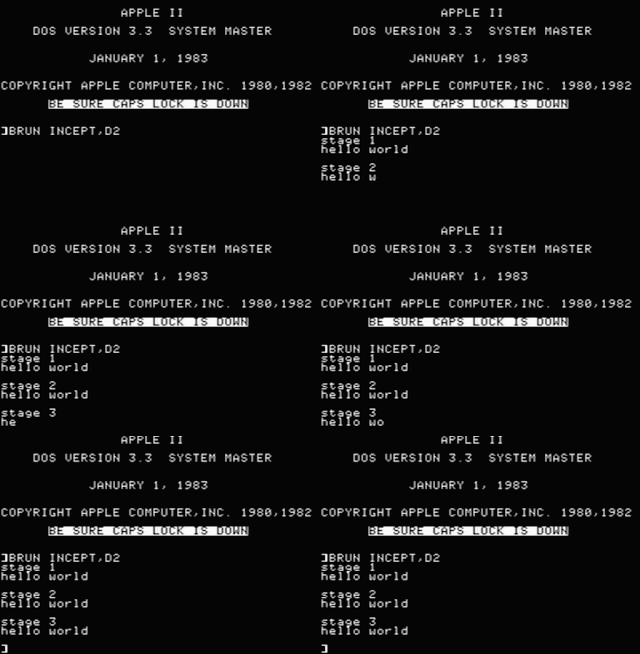
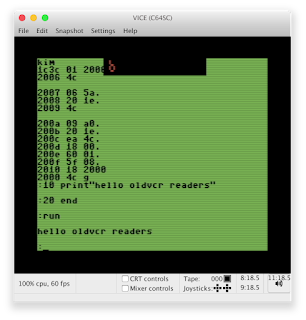
It's almost burying the lede to announce that, though, because the real meat in this entry is how the Commodore 64 manages to emulate a very different 6502-based system. That piece is "6o6," for "6502-on-6502," and is a full virtualized software NMOS 6502 CPU that runs on a 6502 CPU — which I've open-sourced too. It has full control of guest code execution, including trapping undocumented and jam opcodes, and completely abstracts all memory access, making it possible to remap addresses, intercept illegal reads or writes, or even run entirely from virtual memory. On top of that, it's complete enough to not only pass a full functional test but also virtualize itself virtualizing itself:

These GIF screencasts are real-time with no tricks. Here a Commodore 64 and Apple IIe are both running a guest "hello world" payload within 6o6 (stage 1), which is nearly instantaneous, then 6o6 running the payload as a payload within another instance of 6o6 (stage 2), which is a little slower, then 6o6 running 6o6 running 6o6 running the payload (stage 3), which is glacial. But all of it works!

Monday, September 11, 2023

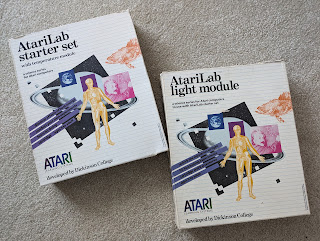
The spawn of AtariLab and the Universal Lab Interface

We were a Commodore 64/128 household growing up, and Apple IIe systems at school, but that doesn't mean I was unaware of Atari 8-bits. There was a family at church who had an 800XL and later a 130XE — and a stack of COMPUTE!'s I used to read through for hours — and it was interesting to compare the two worlds, especially the relatively luxurious Atari BASIC and DOS against Commodore's spartan accoutrements. On the other hand, there was a lot more software and peripherals for the C64 by then, and you ended up becoming a lot more proficient with the guts of the hardware because you had to. Plus, Jack Tramiel's Atari was a lot like Jack Tramiel's Commodore and not always in a good way. I have an XEGS (functionally a 65XE when you add the keyboard) and a 1050 disk drive I should set up somewhere and mess around with a little.

But that doesn't mean Atari didn't try. Prior to all that, Atari in the Warner Communications days put forth substantial effort to make it competitive in all kinds of settings, notably education. Ataris had some unique hardware in that niche; an Atari was the first non-Control Data microcomputer to access the PLATO network, for example. And then there was the AtariLab.

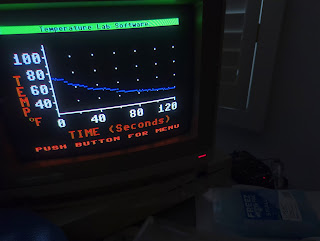
With a very simple interface box, your Atari 8-bit could read the temperature and sense brightness. You could run experiments on it at school, including polarized and coloured light, or testing how quickly things cool and heat. You could use it at home with your own programs thanks to its comprehensive documentation.

But the surprising part is that even though these were the only such devices released under the AtariLab name, they weren't the end of the line: besides its stealthy revival for other home computers like the Commodore 128 running it here, its creator also turns up in one of the more interesting scientific data acquisition devices I've run across in its price range. We'll test-drive the software, hack on the platforms a little, and try some even more outlandish sensors. Let's go down the rabbit hole with AtariLab — and its full-fledged descendants.

Saturday, August 12, 2023

Cracking DesignWare's The Grammar Examiner on the C64

It's been awhile since I've stripped the copy protection off a Commodore 64 software package. This weekend I had a reason to.
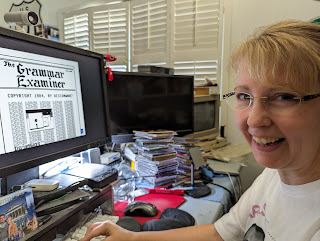
I should point out a couple things as preamble. First, my parents insisted I would not rot my brain with games (much), so we had a lot of educational titles for our C64, and second, my wife is a high-school English teacher. I kept a number of packages from back then and one of them was a secondarily acquired copy of DesignWare's The Grammar Examiner from 1984, something like a mashup between a board game and Strunk and White's Elements of Style, where you get to edit a fictional newspaper and fix all the typos and bad punctuation in your quest to become editor-in-chief.

I rather liked it back in the day. Don't judge. My wife — who used Commodores as a girl in the Australian school system but not this particular title — enjoyed it even more than I thought she would, enough so that she occupied VICE on the Talos II playing it all afternoon and prevented me from writing this.

The Grammar Examiner plays well enough on my real Commodore 128DCR, though it's a very slow loader, and I only have an original disk which I'd like to preserve. (My original original copy disappeared a while back, though I've had this particular one at least a couple decades.) A quick sector-by-sector D64 image using a ZoomFloppy yielded a number of apparently intentionally bad sectors typical of early 1980s copy protection, but even with the error information the program's loader just plain hung up in VICE trying to boot the copy. Yes, a nibbled raw copy of the GCR would work and I imagine people have made one of this title, but we'd also like to speed up the process instead of burdening the emulator further (and it would be nicer on the real system too).

So in this post we'll explore the loader routine, decrypt and extract it, figure out how the copy protection is implemented and work around it, and then pull out the payload it reads for a faster start. While we're at it, let's look briefly at the program itself, an interesting example of Forth programming "in the large" on 1980's home computers.

Tuesday, March 21, 2023

Printing real headline news on the Commodore 64 with The Newsroom's Wire Service

Besides other things I've written or supervised, so far in my time I've also edited three periodicals, and Springboard Software's The Newsroom is a big reason why. In today's article we'll not only look at the guts of this pioneering 1984 software package, but also solve a childhood mystery I've wondered about since the very first day I touched the program by MITMing an RS-232 connection to snoop on serial data — and then print out a brand new 2023 newspaper with 2023 headlines to prove we cracked the case. (Scroll to the end if you just want to see the finished product.)

Sunday, February 5, 2023

Instruction fusion and a real serial port for your virtual KIM-1: The Incredible KIMplement 0.3

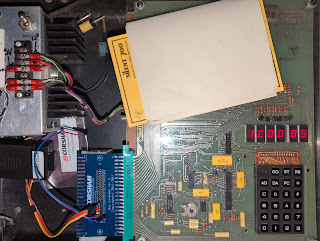
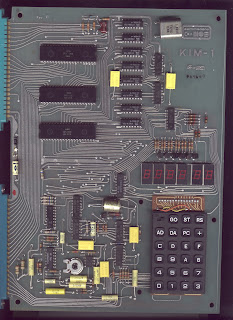
Everyone should have the retrocomputing experience of a 1976 1MHz MOS 6502 single-board computer with 1K of memory, six hex digit LEDs and a keypad. One of the earliest such systems and one of the least expensive, you program the KIM-1 in 6502 assembly language right on the keypad in hexadecimal and it's amazing what you could do with a system that little. You could even hook up a cassette deck and an external terminal and have a full system for just a few hundred dollars; MOS Technology (and later Commodore) consequently sold a ton of them. We first experienced the KIM-1 in high school and having grown up with Commodore 64s and 128s it was like meeting their long-lost little brother. We spent the whole weekend typing in hex opcodes and learned how to bang on the hardware and make it do surprising things in a space that small. That's the very unit in the picture, still in my possession, and over four and a half decades old it still works.

While I now personally own four KIMs (an MOS Revision A, plus a Commodore Revision D, a Commodore Revision G and this Commodore Revision F, my first), it's naturally more convenient to develop on an emulator and then test on the real thing. The KIM is such an easy system to understand that there are other KIM-1 emulators like it, but this one is mine. And the Incredible KIMplement runs on a Commodore 64, so anyone can run it on just about anything that can emulate a Commodore 64, or even a real Commodore 64.

However, I also think the KIMplement is a darn handy emulator if I do say so my darn self. It naturally supports the keypad and hex LEDs, and loads and saves memory like every other basic KIM-1 emulator, but it also supports a virtual teletype on the Commodore 64's console (the MAME driver still can't do that) and implements a true KIM-4 expander with 16K of total addressing space.

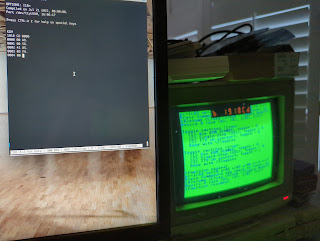
But new in this version, and the only emulator that currently supports it so far, is you can now redirect the virtual KIM's TTY to the Commodore 64 user port as a real physical serial connection: a physical serial port for your virtual KIM-1. The picture shows a real Commodore 128D running the emulator, connected to minicom on my Linux workstation over USB serial from the 128's userport at 300 baud. From the Linux machine's perspective it's practically indistinguishable from my real Revision F unit, and on Commodore 64 emulators that support it (like VICE), you can tunnel the emulated 64's user port over a TCP socket to give your virtual KIM an Internet connection — we'll demonstrate that below. Plus, this means your virtual KIM can now call out to the real world as well as in! (What can you do with that? Stay tuned for a future entry!)

Tuesday, January 3, 2023

The MOS 6502 is (mostly) Turing-complete without registers

It is known that the x86 MOV instruction is Turing-complete (PDF) all by itself, and is even a compiler target. More usefully, x86 can be made Turing-complete without the overt use of any registers.

These tricks work primarily because the ISA allows memory-to-memory operations, i.e., altering a memory location without explicitly moving data through a program-visible register, a historical holdover from its roots in the Intel 8086 and its ancestors. (Let's not even talk about its Turing-complete faults.) Other pre-RISC CPUs of that era also have memory-to-memory addressing, including the MOS 6502, which despite its simplicity being inspiration for the RISC ARM architecture is not itself RISC. It should be no surprise you can make the 6502 do this trick too even with its more constrained instruction set, and we can do it with just four instructions, not counting rts to return to the operating system.

Saturday, November 12, 2022

Meet your new two-factor authenticator: your Commodore 64

Multi-factor authentication is ripe for disruption. SMS 2FA is inherently defective. Phone authenticators get stolen. Security tokens get lost.

But just try misplacing a Commodore SX-64. And any thief who tries to grab it and run gets a free hernia truss from the prison infirmary:

Plus, I've got a colour for every key!
And it actually works:
The terminal window is showing a generated time-based one-time password for a full key, and the emulated 64 is showing the correct key, at the correct time, which was known and tested to be valid. Yes, you really can use your Commodore 64 for multi-factor authentication to generate TOTP codes!

Monday, March 28, 2022

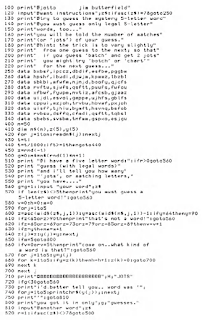
prior-art-dept.: 5 letter words (Jim Butterfield's Jotto)

I mentioned the Wordle craze, including the extant ports to the Commodore 64, in our KIMdle sorta-Wordle for the KIM-1. But the Commodore 64, and I suspect this was actually a PET game originally, had a five-letter word game before that. Jim Butterfield's port of the 1955 Jotto board game isn't Wordle — it tells you merely how many letters matched — but it's undeniably an ancestor concept. Jotto appears in the Commodore 64 user's guide on page 145 and is believed to be public domain. It is reproduced in its entirety in this scanned image.

Thursday, September 9, 2021

The Incredible KIMplement 0.2b: a KIM-1 emulator for the Commodore 64 (and the Superkim)

As I manage to eke out a little more time now for personal projects, since TenFourFox is coming to a close and the OpenPOWER JIT is developing at record pace, it's time to dust off some older items I've really neglected. This last week I started by updating the Incredible KIMplement, my MOS/Commodore KIM-1 emulator for the Commodore 64.

No, that's not a joke. The KIMplement runs real KIM-1 code using a software 6502 core I've christened "6o6" (6502-on-6502). 6o6 implements protected memory, exception handling and all legal NMOS instructions. In addition, the KIMplement not only emulates those famous six seven-segment LEDs and the hex keypad, but also is one of the few KIM-1 emulators that emulates a TTY connection (an old-school ASR-33) and a KIM-4 expander with 16K of RAM, allowing you to run "big programs" too.

The KIM-1 is one of the earliest single-board computers, at least in the sense we conceive of them today. It was introduced in 1976 as an enticement for engineers to play with the MOS Technology 6502 which was then the cheapest microprocessor on the market. MOS had just gotten its pants sued off by Motorola, who did not like the prospect of an inexpensive drop-in replacement for their 6800 CPU; the MOS 6501 was completely pin- and bus-compatible, and where the 6800 cost $179 the 6501 was priced at just $25. The "lawsuit compatible" 6502 was just as cheap, but because the pins had been rearranged, couldn't be substituted without additional design work. The KIM-1 provided a platform for engineers to become more accustomed with the 6502, featuring a 1MHz CPU, 1K of RAM, cardedge I/O, a keypad, LEDs and in-ROM support for teletypes, punch tape and cassette tape, for only $245.

MOS expected this would be a low-volume item mostly of interest to circuit designers. Instead, hobbyists bought them in large numbers because it was easily the least expensive microcomputer you could purchase at the time. With a KIM-1 at its center, you could have a full system with teletype, power supply and cassette storage for around $500. No other system came close to competing on cost. When Commodore Business Machines bought the ailing MOS in 1977, they wisely kept producing the KIM-1 until 1979 even after the introduction of the PET. Several clone systems exist, most notably including the Synertek VIM-1/SYM-1, as well as one unusual clone I'll talk about in a moment. I am the proud owner of four KIMs (including an original pre-Commodore KIM-1) and they all work.

I don't know if KIMplement's CPU core could be truly considered "virtualizing" the 6502, but it's more than just a naïve emulation. Rather than manually setting results and flags, the core looks at the guest instruction and runs the same instruction (or a safe variant) in the core context so that all the side effects, in particular changes to the status register, occur "for free." There is no way that a Commodore 64 at 1.0225MHz (or, worse, 0.978MHz for PAL) can do full-speed emulation of a KIM-1 running at 1MHz, but because there is much less code running per instruction, I think this scheme is probably near the fastest way a 6502 can run "untrusted" 6502 code. In practice it is about 35-50 times slower than native code, and this upsets programs that use tight timing or cycle counts, but it's still absolutely enough to actually "do things."

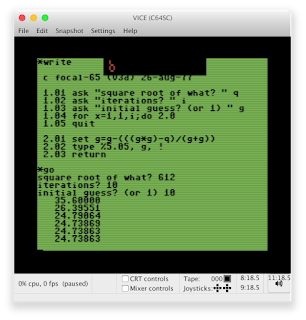
What sorts of things? Besides a couple LED-based games (originally Jim Butterfield's version of Lunar Lander, and I also added the misère game variant Black Match) and toy applications, you can run Tom Pittman's Tiny BASIC in the TTY, and with the bug fixes in 0.2b now you can successfully run FOCAL-65:

This screenshot in VICE shows the emulated 64 running a full FOCAL-65 program to manually compute square roots using Newton's method. It takes it a few seconds to do each iteration, but it all works. This is also a good demonstration of the FOCAL programming language itself including its unusual "floating point" line numbers (actually module and line), which it inherited from its more complex ancestor JOSS.

For this version of the emulator (0.2b), I finally finished some performance improvements to the CPU core that had been gestating in my mind for literally years -- the last version of the KIMplement was released in 2006! -- and also fixed a problem with the TTY emulation where typing characters could get out of sync under CPU load. It can still drop keystrokes if you overflow the Kernal keyboard buffer, but it's a lot smoother generally. I also worked around a bug in VICE where, if you try to load files from a directory on the host machine, the RENAME-the-file-to-itself test used to check for the file's presence doesn't work (a real 1541 would respond with error 63 FILE EXISTS but VICE says 0 OK).

The other bug I fixed was caused by the CPU core, but can't be fixed in it. The 6502 has a decimal flag which can be set in the status register and causes add and subtract instructions to operate in binary coded decimal (e.g., $90 - $01 normally is $8F, but in BCD mode it's $89). Famously, or perhaps infamously, the Commodore 64 Kernal IRQ doesn't turn off the decimal flag, and there is at least one SBC in the normal execution path. Because 6o6 executes instructions for their side effects, if a program had previously set the decimal flag (and this is not at all uncommon in KIM-1 code) it needs to be on for those math operations. The usual solution is to turn on the interrupt flag first with SEI to suppress IRQs while decimal mode is on, but the normal state of guest code is to have the interrupt flag clear because the KIM-1 doesn't have this problem. If an IRQ hits right that moment, the IRQ will be executed with the decimal flag on, and possible unexpected behaviour could result.

This is an extremely infrequent occurrence, but in a long-running system "infrequent" is a synonym for "inevitable." This can't be efficiently solved in the core because there is no atomic method for controlling two flags at once. A better solution is very simple: we just make a patched IRQ that clears the decimal flag explicitly, and calls the normal Kernal IRQ. I did the same for NMIs as a belt-and-suspenders approach.

The eventual goal is to open-source the KIMplement, and in particular 6o6, but I want to have another demonstration application for 6o6 as well before I do. A small multitasking general-purpose kernel sounds like an ideal way to show off how it works.

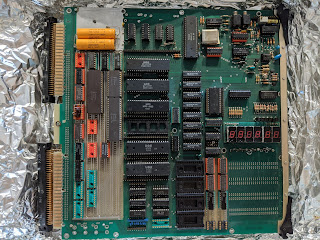
On my main KIM-1 site I also put in a few words about the microproducts Superkim. This 1979 variant of the KIM-1 was developed in Redondo Beach by Paul Lamar, who had been using KIM-1s for automotive performance testing but was unsatisfied with their expansion capacity. Unlike the hobbyist audience of the KIM-1, the Superkim is all business. The unit in my possession was clearly in a card cage; the hex keypad was never even fitted. It uses a custom board rather than a modified KIM-1 with sockets for RAM, ROM and up to four 6522 VIAs (this unit has 4K of static RAM and a Rockwell R6502P), and sports a full prototyping breadboard on-unit. But its most noticeable (and, I might add, intimidating) characteristic is the 200 gold wirewrap pins penetrating the board:
I have no idea what the sam heck this board was doing, but it clearly did something major in whatever its application was. Don't ask me to power this thing up because I'm worried I'll short something out somewhere. I don't know how many of these were ever sold and Commodore and MOS seem to have had nothing to do with its development.
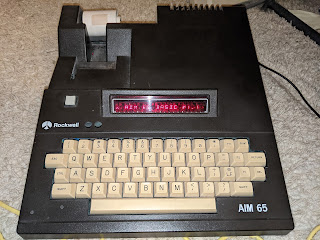
Of the clones I find the Superkim the most interesting. While many people mention the Rockwell AIM-65 as a clone (my unit is above), and it is strongly based internally on the KIM-1, its substantial expansion (wide alphanumeric LED screen, full keyboard, printer) would not make it generally recognizeable as such. I think the Synertek VIM-1/SYM-1 are more characteristic, though that is one unit I don't personally possess.

In the future, and hopefully that future isn't in another 15 years, I want to add actual cassette support (right now you just dump memory to and from disk) and maybe support for one of the hi-res video boards like the Visable. It may also be worth trying to port the KIMplement to a faster 6502-based system like the Commodore Plus/4 or the Commodore 128 in 80-column mode, or maybe even the Apple IIgs, though all of these would need a solution for the sprites I currently use for the LEDs. (Okay, you Atari freaks, I know, I know.) The KIM-1 is a great little machine and surprisingly capable. The fact all of mine have survived over four decades proves they don't make them like they used to.

You can download a .d64 or .sdas of the Incredible KIMplement and its demo applications, or read more about the KIM-1.

Tuesday, April 20, 2021

The better way to get VICE on Ethernet with SELinux

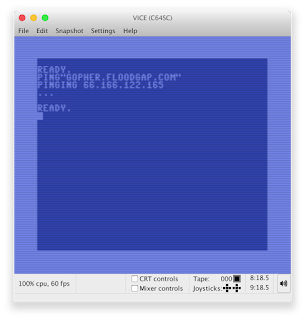
Although I was a registered hardcore user of Power64 when my daily driver was still a Power Mac, now that I'm a daily Linux user on this Raptor Talos II the best Commodore 64 emulator is clearly VICE, the Versatile Commodore Emulator. It not only has highly accurate emulation, but can talk to real disk drives over OpenCBM (I use it with a ZoomFloppy xum1541) and even emulates a whole mess of peripherals, including Ethernet cartridges like the RRNet and clones (on my real Commodore 128, I use a 64NIC+).

However, I'm a Fedora user and SELinux is on by default. SELinux will really ruin your day here because it (quite reasonably) sees a random user application trying to tunnel out a network connection through libpcap/libnet as a security risk and disables it by policy. You find this out the hard way by trying to enable the Ethernet cartridge from the VICE preferences interface and getting a message you need to run it as root. I don't run things like Commodore emulators as root, spank you very much.

Fortunately, there's an easy, (probably) one time workaround; with libpcap and libnet installed (using tun/tap isn't supported yet), you will have to be root just once to fix the problem. Assuming x64sc (or whichever VICE component you're using) is in /usr/bin, you can give it raw network access with setcap cap_net_raw,cap_net_admin=eip /usr/bin/x64sc. Now you should be able to run it without root privileges and be able to access the raw interface. Here's a little test in Kipper BASIC:

Makes cross-development a lot easier!

Thursday, December 24, 2020

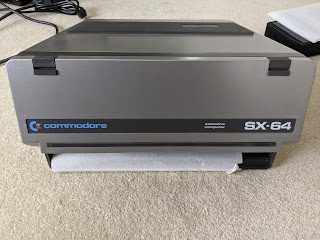
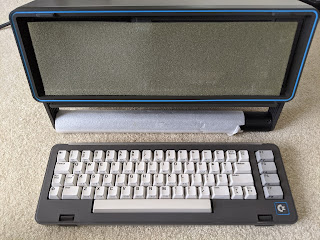
Unboxing the best gift of 1983: the Commodore SX-64

Happy holidays and to those of you that celebrate it a very merry Christmas. As a holiday-appropriate entry, let's unbox ... a Commodore SX-64!

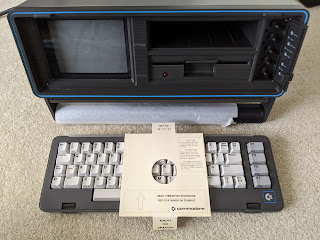
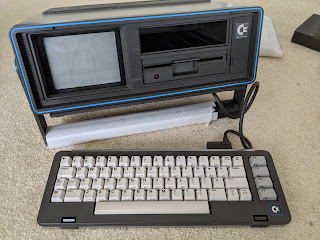
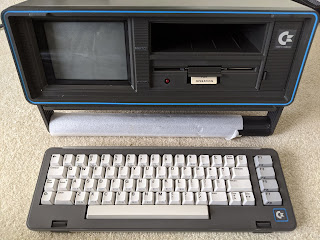
The Commodore SX-64 has the distinction of being the first portable colour computer. Originally part of an entire family of portable Commodore 64 systems, it was supposed to be the midrange model between the black-and-white SX-100 and the dual drive DX-64 as announced at Winter CES 1983, but only the SX-64 was ultimately released by May of that year. (There was even an SX-500, based on the Amiga 500, but it never got past the prototype stage.) Portable in this case is used advisedly, as it weighs about 23 pounds, but it has a 5" monitor which isn't terrible, a built-in 1541 5.25" floppy drive and a detachable keyboard all in one tank-like enclosure that can be lifted around by the handle (which doubles as a stand). Power usage is too much to run on an external power source any smaller than your typical car battery but in the age of systems like the Osbourne 1 such a machine wasn't implausible as a luggable. It did not sell particularly well but the sheer number of SX-64s that survive and see regular use today (I actually own three others) attests to their residual popularity. I acquired this SX-64 as NOS still in its original box and packaging a few months ago and decided to get it out of storage as a fun little exploration.

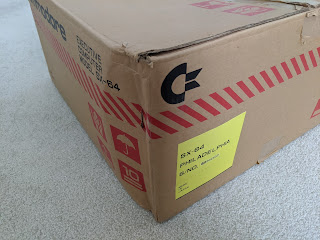
Getting it out, we experience our first Christmas emotion: anticipation. This box was only opened by the previous owner to check the contents, though it got flattened a bit by sitting stacked in the storage unit.

Obviously Commodore didn't lose a lot of sleep making the box pretty (not like the regular C64 or other packages); it's plain jane cardboard in the same look as their printer boxes and certain other sub-sexy accessories. The indication "PHILADELPHIA" on the label suggests this was stocked at their West Chester, PA headquarters. Although it's likely some stores did sell the SX-64 at retail, at least as a kid in Southern California I didn't see any retail sales at the usual suspects of the day, including where we bought our 64 and 128 and peripherals (Target, Sears, Toys R Us, etc.). We will verify the serial number shortly.

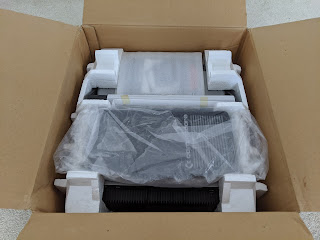
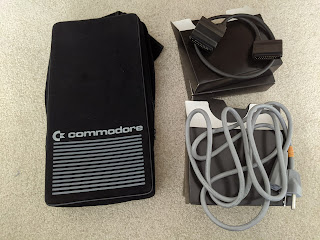
And now the second Christmas emotion — delight — as we see the SX-64 inside. On top is (in protective foam wrapping) the manual, and (in protective plastic) the "saddlebag" accessory that is very precious to SX-64 owners that is often separated from used units. I have put the manual aside. Let's get the saddlebag out of the plastic.

The "commodore" and logo are silk-screened onto the fake fuzzy exterior, which on my other units is worn or faded, but not so here on this absolutely pristine one. Inside the saddlebag are two boxes of the type 5.25" floppies used to come in. One contains a totally ordinary grey IEC power cord but the other contains a beautiful new DB-25 keyboard connector cable. (A straight-thru DB-25, suitably machined to fit, will do if your SX-64 doesn't have one.)

Serial number checks out. This unit has a manufacture date of September 1983 and was "made in Japan." SX-64s have the full complement of ports except for cassette; the SX-64 Kernal ROM instead defaults to device 8 (the internal disk drive), but has a bug that overruns the input buffer when using the SHIFT-RUN/STOP shortcut to load from disk. The Kernal also uses different, higher-contrast colours. You can connect an SX-64 to an external monitor, but do it when the power is off or you can kill the SID (I've actually done that once, to my great chagrin).

The other major glitch with the SX-64 was the top-loading expansion port. Its ribbon cable to the mainboard was so inadequately shielded that devices like REUs would not work reliably, forcing Commodore to issue a service pack to correct the problem.

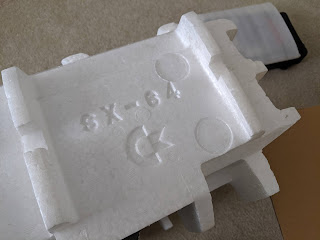
Each side of the main unit's Styrofoam packing has "SX-64" and a Commodore logo stamped on it.

Portrait with the foam sheet protection still on the handle.

Foam protects the screen.

... well, sort of. Degrading as polyethylene foam of this age often does, the foam had also left a little "extra" but it was easily wiped off.

With the disk drive and monitor control door open. The 1541 disk drive still had the original head protector, which is a cardboard insert to prevent the disk heads from clattering themselves to death during transport. Please, if you're shipping a 5.25" drive, put a head protector in. A throwaway floppy disk will do nicely.

And finally, all plugged in and ready to rock, we now experience the last and most bittersweet Christmas emotion: disappointment. This unit does not power on. After some cursory checks of the fuse, it appears to be the power supply, which while more reliable than the obnoxious C64 potted epoxy brick is still subject to the capricious ravages of time. This unit will thus become a spare.

(The unboxing experience isn't exactly contemporary Apple, but I think I still would have been excited.)

Sunday, December 13, 2020

Stereoscopic computing: anaglyph sprites on the Commodore 64

This article is part of a series -- you can read other entries

In our first 3D article we talked about the various types of stereoscopy available on computers. Modern systems can both generate a 1080p image and/or (with most video cards) a high-refresh-rate image, and most 3D displays or 3D-capable TVs are 1080p, so depending on whether you have an active or passive display system you can either use fast refresh (like my 120Hz DLP projector, which delivers a full 60Hz to each eye with active glasses) or an interlaced image and polarization (like my Vizio 3D TV and Mitsubishi Diamondcrysta monitor). This generates a high-quality, (usually) flicker-free high definition 3D picture.

However, classic computers invariably don't have either of those options, so we must resort to less satisfactory approaches. While some systems implemented a spinning shutter wheel as an active 3D display option, many older systems lack sufficient refresh rates to be sufficiently smooth and very old machines can't update the screen fast enough between eye views anyway. (That gives me a headache just thinking about it.) For most situations the typical choice will be either anaglyph, i.e., red-cyan glasses, or exploiting the Pulfrich effect. The latter, though not general purpose due to how the effect is generated, can be sufficiently convincing with the right application and we'll look at that in a later article. A third option is possible with modern displays but it, too, will be the subject of a later post. Today we'll try to get a primitive anaglyph effect working on the Commodore 64, and we'll do it with the classic and widely available red-cyan glasses you can get on Amazon or from specialty shops like Berezin (no affiliation, just a satisfied customer).
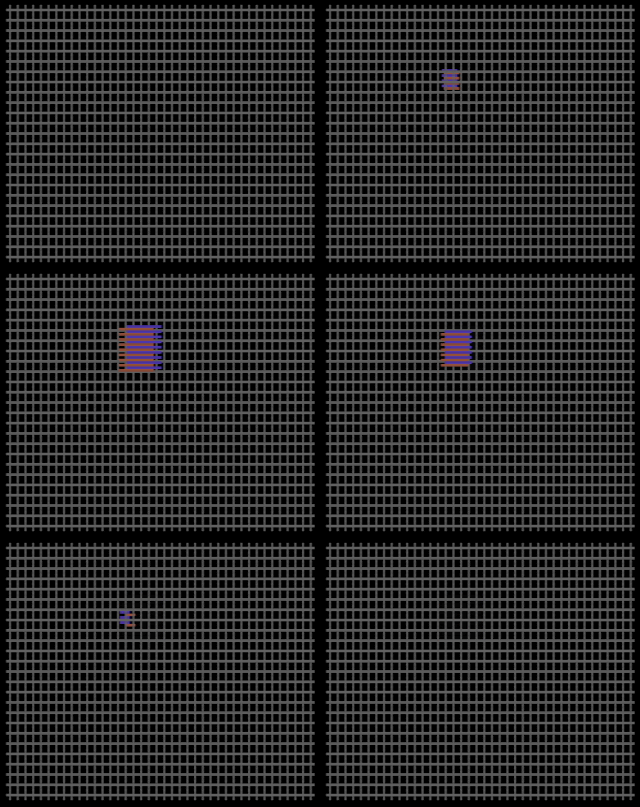
The basic concept with anaglyph is that the coloured glasses filter certain wavelengths of light, delivering different views to each eye. Since the red filter is over your left eye, your left eye only gets red (primarily), so the image that should be delivered to the left eye is tinted red. Likewise, as the cyan filter is over your right eye, the cyan filter should optimally admit only what is part of the right eye image. In practice, as anyone who's looked at anaglyph images knows, the strategy is imperfect: most full colour images will have some bleed-through and while colour selection and processing can reduce differences in brightness between the eyes, some amount of ghosting and retinal rivalry between the two sides is inevitable. Still, anaglyph 3D images require no special hardware other than the glasses and some well-constructed images can be very compelling.

To make objects stick out, the left (red) channel is separated further and further to the left from the right (cyan) channel; to make them recede, the left channel is separated further and further to the right. When the channels overlie exactly, they are seen at a neutral distance from the viewer as appropriate to the image's composition. The mnemonic is thus the three R's: red right recedes.

Unfortunately, conventional colour anaglyphs are difficult on a system like the C64 because there is only one fixed, limited palette and the shades available may not correspond well with the lens colours. You may be able to make the displayed colours more appropriate for your glasses by messing with the display settings or colour balance, but this naturally has other side effects. Additionally, there is no alpha channel, so overlaying objects (which is necessary to deliver two views in one image) just obscures what's behind them. Usually you would use a proportional shade of purple to deliver an appropriate level to each eye but the C64 has but one shade of purple, and you would have to manually figure out when to use it.

A way around the latter problem is to either dither or (as a special case of dithering) interlace. This reduces resolution but eliminates having to do costly alpha calculations and screen updates. One way of doing a 3D anaglyph display on a C64 is alternating red/black and blue/black lines in multicolour mode, as the red (VIC-II colour 2) and blue (VIC-II colour 6) shades are the closest shades to most red-cyan glasses. This gives you effectively a 160x100 monochrome image. For greater dynamic range you could also consider red/pink/black and blue/light blue/black on alternating lines, using black as the common background colour, and some of the CPU-assisted modes like FLI and Hires FLI can do even better. But this requires substantial precomputation to generate the image and thus is only generally useful for static images. How might we do this for a dynamic display?

While computers like the Amiga have playfields for overlaid elements, the VIC-II chip in the C64 really only has one option: sprites. Sprites do effectively have an alpha channel, but it is a single bit, so there is no translucency. Thus, if we want a dynamic 3D anaglyph display on the C64, a straightforward means is to interlace a blue sprite and a red sprite, yielding a composite 3D plane that can move in the Z-axis by changing their relationship to each other. And that's what we'll do here.

The illusion of depth is enhanced not only by the shift between the left and right channels, but also the size of the object, so we will need a routine to scale a sprite. For simplicity we'll just use a solid square block, which we can generate on the fly. Sprites on the C64 are 24x21, each row three bytes in length, up to 63 bytes in size. We will write a quick little utility routine that will turn a number into a string of bits, and then copy that to the same number of alternating lines, clearing the rest of the sprite so we can grow and shrink it at will.

The assembler source for this quick interlaced sprite scaler is on Github and can be cross-assembled with xa. We'll put the sprite at 832 ($0340) in the cassette buffer, which appears as SPRITE in the text. Here's some highlights.

        jsr $aefd
        jsr $ad9e
        jsr $b7f7
As a convenience for playing around in BASIC, these calls accept a comma after the SYS statement followed by an arbitrary expression, and then convert the result to a 16-bit integer and store it in $14 and $15. We only care about the low byte, so $14 is the entirety of the value. We clear the top row of the sprite, and if the parameter is zero, just copy that to the rest of the sprite (clears it). Otherwise, let's make enough one bits in the top row of the sprite by setting carry and rotating it through:
        ; turn x into x 1-bits
lup1    sec
        ror SPRITE
        ror SPRITE+1
        ror SPRITE+2
        dex
        bne lup1
We then duplicate it on alternating rows (unless it's 1x1 or 2x2).
        sbc #0 ; ror cleared carry, so -1
        lsr
        beq clrs ; no copies

        tay
        clc
lup2    lda SPRITE
        sta SPRITE+6,x
        lda SPRITE+1
        sta SPRITE+7,x
        lda SPRITE+2
        sta SPRITE+8,x
        txa
        adc #6
        tax
        dey
        bne lup2
And then we clear the rest of the sprite. We assemble this to 49152 and load it, then set some parameters. After you load the binary into VICE from wherever you assembled it to (and remember to type NEW after loading), you can cut and paste these POKEs into VICE.

poke53281,0:poke53280,0:poke646,12:poke53287,6:poke53288,2
poke2040,13:poke2041,13:poke53271,3:poke53277,3
poke53248,150:poke53249,100:poke53250,150:poke53251,102:poke53264,0
sys49152,10:poke53269,3

You'll get this display.

We have set the sprite colours, made them double size for ease of use, and positioned them so that they are interlaced. If you put on anaglyph glasses at this point, it's just a block at neutral distance. Let's write a little BASIC code to move them around as a proof of concept. You can cut and paste this into VICE as well:

10 rem midpoint at x=10
20 forx=0to20:poke53250,160-x:poke53248,140+x:poke53251,110-x:poke53249,108-x
30 sys49152,x:for y=0to50:next:next
40 forx=20to0step-1:poke53250,160-x:poke53248,140+x:poke53251,110-x
50 poke53249,108-x:sys49152,x:for y=0to50:next:next
60 goto 20

With glasses on, you will see the block swing from receding into the distance and protruding into your view by sliding and scaling.

There are two things to note with this primitive example. The first is that the steps end up separating the red and blue components quite a bit; combined with the afterimage from the bleedthrough, we end up seeing two blocks at their furthest extent. We can solve that problem by separating the sprites at a slower rate (say, half) than the scaling rate. This limits how far the composite plane can be moved in the Z-axis, but there are usually other optical limits to this generally, so we're not losing as much as one would think.

The second thing to note is it's kind of jerky because it's not updating the sprite registers fast enough (the delay loop is just there so you can see each step of the animation; the lack of smoothness is because of the computations and POKEs necessary on each "frame"). We'll solve this problem by rewriting the whole thing in assembly language. For style points we'll add a background (a crosshatch) as a neutral plane, and flip the sprite priority bits for the composite plane as it moves forward and back so that it also has proper occlusion.

The assembler source for the "complete" demo is also on Github (and also cross-assembled with xa), but notable parts are discussed below. We will write it with a small BASIC loader so we can just LOAD and RUN it.

        .word $0801
        * = $0801

        ; 64738 sys2061

        .word $080b
        .word $fce2
        .byte $9e, $32, $30, $36, $31
        .byte $00, $00, $00
The motion routine is more or less a direct translation of the BASIC proof of concept except we will separate the sprites by only half of the scaled size for less of a "double vision" effect, so we change the constants to match. Here VALUE is still $14, which we're still using merely as a holding location even though we are no longer servicing BASIC directly, and HVALUE is a free zero space location for the temporary result of the math.
mlup    lda VALUE
        clc
        lsr
        sta HVALUE

        lda #150
        sec
        sbc HVALUE
        sta 53250
        lda #110
        sbc VALUE
        sta 53251

        lda #108
        sbc VALUE
        sta 53249
        clc
        lda HVALUE
        adc #140
        sta 53248
At the end we wait a couple jiffies so that the animation is actually visible, check for RUN/STOP, and if not pressed cycle the position in VALUE back and forth. MODE is $15, since we don't use it for anything else either here, and is initialized to zero when we start.
        ; wait two jiffies per frame
        lda #0
        sta $a2
waitt   lda $a2
        cmp #2
        bcc waitt

        ; check run/stop
        lda 203
        cmp #63
        bne cycle
        lda #0
        sta 53269
        lda #147
        jmp $ffd2

cycle   lda MODE
        bne decr

incr    inc VALUE
        lda VALUE
        cmp #21
        beq *+5
        jmp mlup
        sta MODE
        ; fall thru
        
decr    dec VALUE
        lda VALUE
        cmp #$ff
        beq *+5
        jmp mlup
        lda #0
        sta VALUE
        sta MODE
        jmp mlup
Here is an animated GIF of the result you can view with anaglyph glasses, though the result in an emulator or on a real C64 is smoother.

As you can see, the composite sprite recedes and protrudes appropriately, and depth cueing is helped by flipping the priority bits as it goes past the "zero" point (the crosshatch) where VALUE, in this coordinate system, is defined as 10.

While an anaglyph composite sprite approach clearly has drawbacks, it's still in my opinion the best means for independent motion of planar objects in the Z-axis and gives the most flexibility for "true" 3D on classic machines of this era. But the Pulfrich effect doesn't have its colour limitations and can be useful in certain specific situations, so we'll look at that in the next article.